Why 2D Process Docs Matter for AP Students
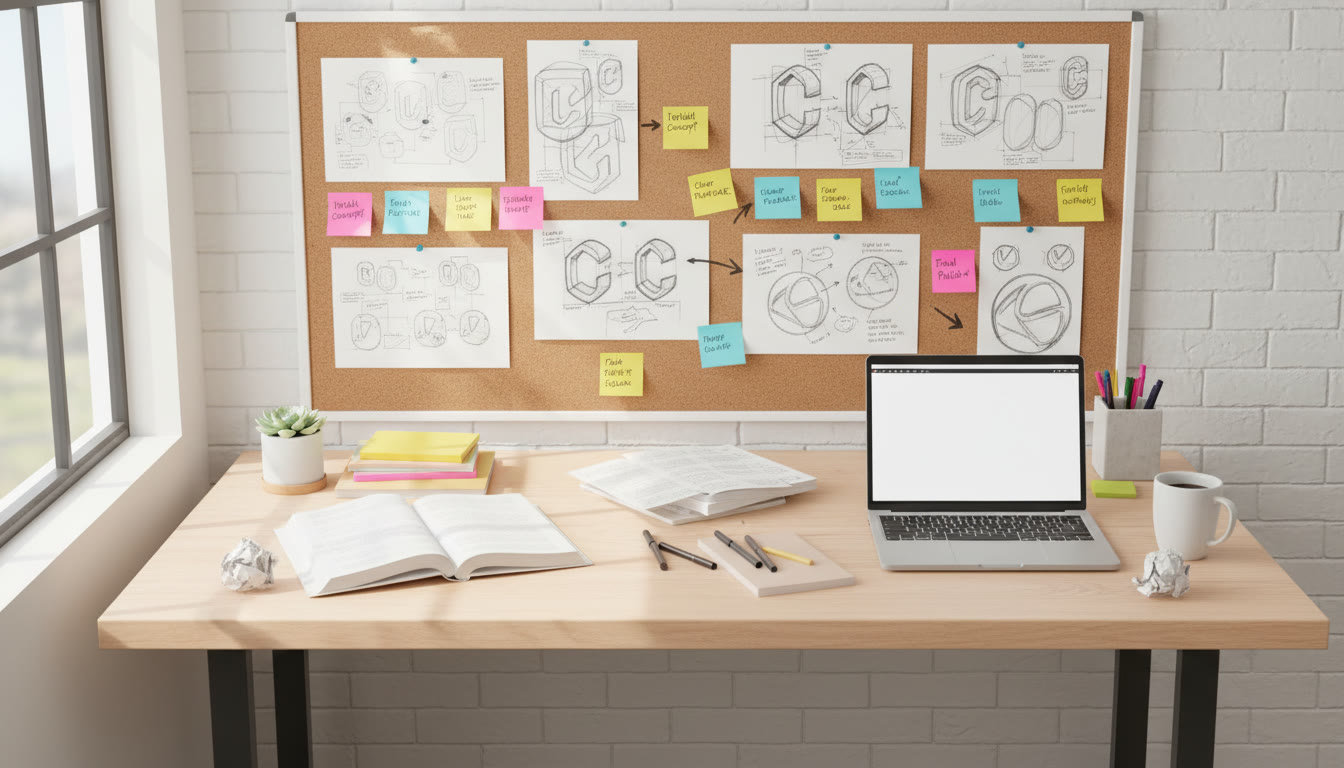
If you’ve ever stared at a blank portfolio page or tried to explain your reasoning on an AP project, you know the difference between an idea and a communicated idea. A 2D process document is more than a timeline or a checklist — it’s a visual and textual record that shows how you iterated, why you chose one route over another, and what you intended to achieve at each step. For AP students, from AP Art and Design to AP Research, mastering this form of documentation turns messy thinking into assessable evidence.
The power of iteration and intent
Iteration proves you didn’t just land on a solution by accident. Intent proves you had a goal and a reason behind choices. Examiners and teachers look for both: they want to see that you experimented, learned from feedback, and adjusted purposefully. A 2D process doc pairs visual artifacts (sketches, screenshots, photos) with short, pointed writing so that anyone can follow your thought process in one glance or one careful read.

What a 2D Process Doc Actually Includes
Think of a 2D process doc as a balanced, two-dimensional canvas where visuals live beside brief, structured commentary. The typical components are:
- Title and project goal (one clear sentence)
- Initial research and inspiration (images, notes, references)
- Key iterations with artifacts (sketches, wireframes, photos)
- Rationale for each iteration (what changed and why)
- Testing and feedback notes (what worked, what failed)
- Final outcome and reflection (lessons learned and next steps)
Each of these sections should be short and focused: aim for clarity, not verbosity. The goal is to make your intent readable and your iteration traceable.
How to Lay Out a 2D Process Doc: Practical Templates
Below are two layout approaches you can adapt depending on your subject and medium. Use them as a starting point; the best layout is the one that makes your thinking easiest to follow.
Template A — Linear Timeline (Good for small projects)
Use when your project follows a clear sequence of steps.
- Header: Project title + one-line goal
- Left column: visual artifact for each step (images stacked vertically)
- Right column: 2–3 bullet points per artifact explaining intent, change, and outcome
- Footer: final reflection and a short note on what you would do next
Template B — Iteration Grid (Best for comparing alternatives)
Use when you explored multiple directions simultaneously.
- Grid with rows representing iteration rounds (Round 1, Round 2, Round 3)
- Columns for: Visual, Intent, Test/Feedback, Decision
- Each cell kept concise — visuals as thumbnails and text as 1–2 sentences
Example: A Student’s 2D Process Doc for an AP Art Project
Below is a written example you could emulate. Imagine the project goal was to explore “Identity Through Everyday Objects”. The 2D process doc extracts the most important moments and decisions.
| Stage | Visual (thumbnail) | Intent (1 sentence) | Key Decision |
|---|---|---|---|
| Research | Photos of family objects | Collect objects that evoke personal history | Focus on objects with tactile or worn surfaces |
| Round 1 | Quick graphite sketches | Explore composition and scale | Rejected literal arrangement for overlapping montage |
| Round 2 | Photographic mockups | Test lighting and shadow to express mood | Choose warm side lighting over flat light |
| Final | High-res image and print study | Combine montage with hand-drawn annotations | Integrated text to highlight memory fragments |
That table is intentionally compact. In your actual 2D document you would pair each row with a visual thumbnail and 1–3 short comments that explain intent and result.
Writing the Intent: Language That Speaks to Examiners
Your descriptions should be precise, reflective, and evidence-based. Avoid vague praise like “I improved composition.” Instead use phrases that explain the rationale, for example:
- “Adjusted scale to make the object dominant and force viewer focus on texture.”
- “Shifted color palette to muted tones to suggest nostalgia; bright accents highlight current identity.”
- “Scaled down typography to avoid competing with the image’s focal point.”
These short, purposeful sentences show intent and help readers — including AP scorers — grasp the ‘why’ behind choices.
Documenting Iteration: What Counts as an Iteration?
An iteration is a meaningful change informed by testing, feedback, or reflection. It doesn’t have to be a complete redo. The following are valid iterations:
- Changing the composition or crop
- Altering color, contrast, or scale
- Adding or removing elements for clarity
- Shifting materials or techniques (e.g., from digital to mixed media)
- Incorporating feedback from peers or teachers
Document each iteration with: (1) a small visual, (2) a one-line intent statement, and (3) one short note about the result or next question it raised.
How to Use Feedback and Testing Effectively
Testing can be informal—peer comments, teacher notes, or your own timed experiment. What matters is showing that feedback led to change. A useful mini-format to record feedback is:
- Feedback source (Peer/Teacher/Self)
- Summary (1 sentence)
- Action taken (1 sentence)
Example: “Peer: composition felt cluttered. Action: removed two background elements and increased negative space to create a clearer focal point.” Keep it brief and tied to a visible change.
Balancing Visuals and Text: The 60/40 Rule
Effective 2D docs often balance image and text. A practical guideline is the 60/40 Rule: let visuals take ~60% of the space and text ~40%. The visuals show artifacts; the text explains intent and iteration. Too much text hides your work; too few words leave the viewer guessing.
Accessibility and Readability Tips
Make sure anyone can read your process doc quickly and understand the timeline of decisions.
- Use clear headings and short sentences.
- Number iterations (Round 1, Round 2) to show sequence.
- Use consistent thumbnail sizes so the layout is tidy.
- Choose legible fonts if producing digitally; 12–14 pt body text is a safe range.
- Include captions for images that clarify what to look for.
One-Pager 2D Process Doc — Quick Build Guide
If you need a compact, portfolio-ready one-pager, follow this layout. It’s optimized for clarity and for meeting AP submission constraints.
- Top-left: Project title + one-line goal
- Top-right: Inspirational image or mood board (3 small images)
- Middle: 3 horizontal bands — each band a thumbnail + 2 short bullets (Intent, Outcome)
- Bottom-left: Short feedback log (3 entries max)
- Bottom-right: Final reflection and next steps (2–3 sentences)
Common Mistakes Students Make — And How to Fix Them
Knowing what to avoid saves time. Here are the most common pitfalls and quick fixes.
- Too many visuals without explanation → Add one-sentence intent notes.
- Long paragraphs that hide the process → Break into bullets and use clear headings.
- No evidence of testing → Include at least 2 feedback entries or user tests.
- Iterations look identical → Emphasize the small, meaningful differences and label them.
- Unclear final rationale → Conclude with a direct statement tying outcome to original goal.
Examples of Intent Statements (Quick Reference)
Copy and adapt these short intent lines to save time while preserving clarity:
- “To emphasize scale, I enlarged the central object and reduced background detail.”
- “Switched to monochrome to test emotional tone and focus viewer attention.”
- “Simplified typography to strengthen hierarchy and legibility.”
- “Increased contrast to improve legibility during daylight viewing conditions.”
- “Introduced hand-drawn elements to balance the digital precision and create human warmth.”
Using 2D Process Docs to Study for AP Exams
Beyond portfolios, 2D process documentation trains a habit that shines in AP coursework and exams: concise, evidence-backed explanation. When you practice explaining your process, you get better at structuring short-answer and free-response answers that require justification and reflection.
Study routine suggestions
- Weekly mini-docs: Summarize one experiment or practice problem each week in a 2D doc format (thumbnail + intent + result).
- Peer review swaps: Exchange one-pagers with classmates and practice writing clean feedback entries.
- Reflection sessions: After a practice exam or project, create a quick process doc to record what changed and why.
Tools and Materials for Creating Strong 2D Process Docs
You can produce professional-looking documents with simple tools. For digital, Canva, Google Slides, or PowerPoint are perfectly fine. For physical artifacts, a clean sheet with printed thumbnails and handwritten notes can be incredibly effective.
- Scanner or phone camera (for thumbnails)
- Light editing software (crop, adjust exposure, compress)
- Consistent template (one saved slide or page you reuse)
- Sticky notes for quick iterative comments during critique
How Sparkl’s Personalized Tutoring Can Help (When It Fits)
Working with a tutor can speed up the iteration/refinement cycle. Sparkl’s personalized tutoring offers 1-on-1 guidance, tailored study plans, expert tutors, and AI-driven insights that help you clarify intent and structure your process documents. A good tutor can provide targeted feedback, suggest alternative iterations you may not have considered, and help you translate messy trials into concise, examiner-ready statements — exactly what a strong 2D process doc needs.
Grading Mindset: What Teachers and Examiners Look For
Although rubrics vary, assessors typically look for:
- Evidence of inquiry and research
- Clear, purposeful iteration
- Thoughtful reflection and learning
- Coherent final outcome tied to original intent
Show these elements succinctly in your 2D doc and you’ll communicate the right story even if your final product is experimental.
Checklist: Final Pre-Submission Review
Before you submit or hand in your process doc, run this quick checklist:
- Title and one-line goal present? (Yes/No)
- At least 3 documented iterations? (Yes/No)
- Feedback entries recorded? (Yes/No)
- Intent statements are crisp (1–2 sentences each)? (Yes/No)
- Visuals clear and cropped consistently? (Yes/No)
- Final reflection ties back to goal and lists next steps? (Yes/No)
Long-Term Value: How 2D Process Docs Build Student Confidence
Creating process documents isn’t just an assignment — it’s a habit that trains you to think in evidence and reason. Over time you’ll find that your projects become more defensible, your presentations more persuasive, and your study sessions more efficient. The disciplined practice of documenting iteration and intent helps you move from uncertainty to clarity faster.

Final Thoughts: Make Your Thinking Visible
If there’s one skill to prioritize this semester, it’s the ability to make your thinking visible. A well-constructed 2D process document does that: it ties together research, iteration, feedback, and reflection into a single readable artifact. Use the templates above, keep your language plain and purposeful, and don’t be afraid to show early failures — they often make the strongest evidence of learning.
And if you want guided help turning your drafts into examiner-ready pages, consider working with Sparkl’s personalized tutoring — they can help you develop clearer intent statements, tighten iterations, and craft polished one-pagers that reflect the true depth of your work.
Ready to start? Quick action plan
- Pick one current project or practice problem.
- Create a one-page 2D process doc using Template A or B.
- Share it with a peer or a tutor and collect 2 pieces of feedback.
- Make one meaningful iteration and add a final reflection.
Do this cycle three times this term and you’ll notice your projects improve dramatically — and you’ll be able to explain your choices with confidence on any AP submission or exam.
Closing encouragement
Remember: the best work isn’t the one that barely survives judgment; it’s the one that shows how it got there. Use your 2D process docs to tell that story honestly, clearly, and creatively.


No Comments
Leave a comment Cancel