Seeing What You Couldn’t See Before: An Introduction to 3D Process Photos
There’s a kind of magic when a complex process—chemical reactions, biological dissections, experimental setups, or an evolving art piece—suddenly becomes understandable at a glance. 3D process photos do that work. They make the invisible steps of a process visible, helping you document methodology, analyze outcomes, and communicate ideas clearly for AP coursework and beyond.

Why AP Students Should Care
AP classes ask more than memorization: they demand demonstration of process, reasoning, and evidence. Whether you’re preparing an AP Lab Report, assembling a portfolio for AP Studio Art, or building an AP Research submission, 3D process photos give your work authority. They turn ephemeral steps—how a gel electrophoresis looked at a specific moment, how a clay form evolved over a week, or how an optics experiment aligned—into recoverable, inspectable evidence.
What Exactly Are 3D Process Photos?
At its heart, a 3D process photo is a set of images captured from multiple angles and/or distances that together represent the spatial and temporal evolution of a process. Instead of a single flat snapshot, you get depth, sequence, and context: how parts moved, how layers changed, and how interactions unfolded over time.
Key Characteristics
- Multiple viewpoints: top, side, and oblique angles to capture geometry.
- Consistent scale and reference: rulers, grid backgrounds, or turntables for accurate comparison.
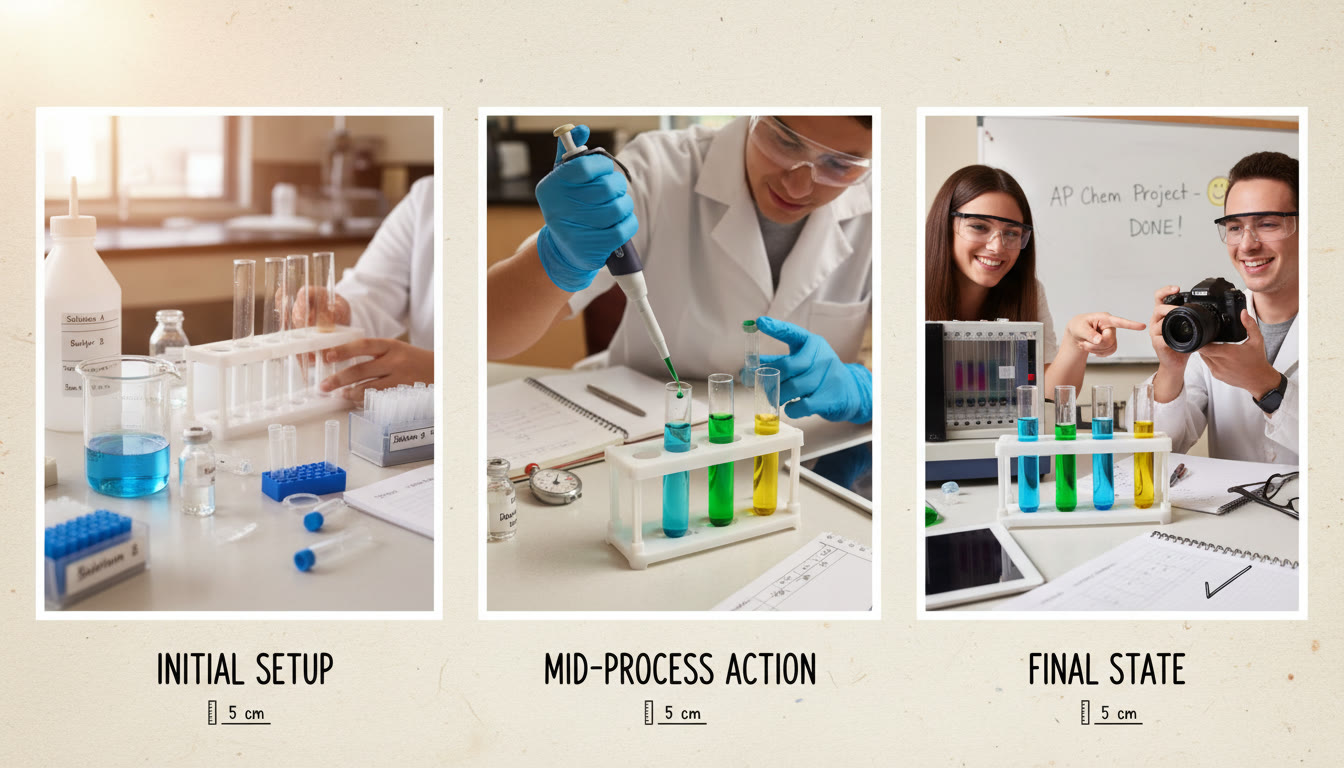
- Time-sequenced frames: showing key moments rather than every second.
- Annotated overlays: arrows, labels, or short captions to explain what changed.
How 3D Process Photos Help in Different AP Subjects
Different AP courses will use 3D process photos in different ways. Here’s a quick rundown of practical applications and the benefits they deliver:
| AP Subject | Use Case | Benefit |
|---|---|---|
| AP Biology | Documenting dissections, microscopic setups, and 3D structure of tissues or organisms. | Clear evidence of procedure and morphological observations for lab reports and replication. |
| AP Chemistry | Showing apparatus arrangement, color changes in titrations, crystallization over time. | Helps graders see procedural rigor and identify sources of error. |
| AP Physics | Capturing motion experiments, alignment of optics, and apparatus geometry. | Enables frame-by-frame analysis and improved measurement accuracy. |
| AP Studio Art | Documenting the evolution of a 3D work—sculpture, installation, or mixed-media piece. | Shows process, intent, and technical development for portfolios. |
| AP Research | Recording protocol steps, apparatus modifications, and qualitative changes over trials. | Strengthens claims with visual evidence and improves reproducibility. |
Real-World Context
Scientists, designers, and engineers have used multi-angle photography and time-lapse imaging for years to analyze processes that are too small, too fast, or too slow to understand otherwise. AP students adopting similar techniques are practicing professional communication—turning their experiments into reproducible, inspectable artifacts that communicate both technique and insight.
Setting Up a 3D Process Photo Workflow
You don’t need a film studio. Most of the value comes from deliberate planning and consistent technique. Here’s a practical workflow you can set up in a classroom, dorm room, or spare lab bench.
1. Plan the Story You Want to Tell
- Define the main question: Are you documenting method, showing change, or proving reproducibility?
- Pick key moments: identify 4–12 frames that represent the process best.
- Decide angles: typically top, front, and one oblique angle are enough for clarity.
2. Choose Consistent Scale and Anchors
Use a small ruler, graph paper, or a standardized background to keep scale consistent across frames. For chemical setups, a labeled beaker or a digital measuring device in shot adds credibility. For art, a neutral backdrop and a scale ruler help capture proportions.
3. Lighting and Safety
- Soft, even lighting reduces shadows that hide detail—diffuse desk lamps or daylight are great.
- For labs, prioritize safety: goggles, gloves, and follow school protocols while photographing.
4. Capture Tools
You can use a phone, a basic digital camera, or a cheap webcam. Mounts and tripods are valuable for consistent angles. A simple turntable is invaluable for small objects—rotate the subject and capture at fixed increments to build a 3D view.
5. Annotation and Metadata
Keep a short log: time, experimental parameters, and any deviations. When you annotate photos, include short captions and arrows to point out the changes you want graders to notice.
Step-by-Step Example: A Chemistry Crystallization Sequence
Let’s walk through a concrete example—capturing the crystallization of a salt solution over 72 hours. This is the kind of process that often appears in AP Chemistry labs or independent investigations.
- Setup: Clear petri dish on a grid background, overhead camera on tripod, thermometer in solution.
- Timepoints: Start (0 hr), Nucleation (~12 hr), Growth (~24–48 hr), Near-Completion (~72 hr).
- Angles: Top (for crystal pattern), Side (for vertical growth), Close-up (for crystal habit).
Each photo is labeled with the time and a one-line observation. These images together demonstrate nucleation, growth kinetics, and crystal morphology—valuable evidence for both lab write-ups and AP Investigative Projects.
Creating a 3D Sequence That Strengthens Your AP Submission
AP graders look for clarity in method and reasoning. A well-documented photo sequence helps them follow your logic without guessing. Use your photos not as decoration but as evidence—place them beside the relevant methods, observations, and claims in your report.
How to Integrate Photos into Deliverables
- Label every image with date/time and experimental conditions.
- Include a short caption that ties the image to a specific claim or measurement.
- When space is tight, use a 2-column layout: images on the left, explanation on the right.
Tools, Tips, and Low-Budget Hacks
You don’t need fancy gear to make great process photos. Here are practical tips that yield professional-looking results on a student budget.
- Use a smartphone camera with grid lines turned on to keep level horizons.
- Make a DIY light diffuser using parchment paper and desk lamps to reduce glare.
- Use a tripod or build a stable mount with books and clamps to avoid camera shake.
- For rotating objects, a lazy Susan or a small turntable gives consistent angles.
- Take RAW or the highest-quality images your device supports—compression loses detail.
Software Shortcuts
Basic photo editors on phones allow cropping, contrast adjustments, and simple annotations. For more complex needs, free desktop tools can stitch multiple angles into a composite or annotate with arrow overlays and scales.
Common Pitfalls and How to Avoid Them
Process photography has traps: inconsistent scale, poor lighting, or too many meaningless frames. Here are mistakes students often make and how to fix them.
- Too many photos without selection: pick the frames that tell the story—quality over quantity.
- No scale or reference: always include a ruler or known object so others can judge size.
- Inconsistent orientation: lock your camera position and mark it so each timepoint matches.
- Poor annotation: captions matter. A photo without a short context is a missed opportunity.
Example Table: A Simple Capture Checklist
| Stage | Action | Why It Matters |
|---|---|---|
| Planning | Outline 6–10 key frames and choose angles | Ensures each photo contributes to the narrative |
| Scale | Place ruler or grid in frame | Enables measurements and grader confidence |
| Lighting | Diffuse even light from multiple sources | Reduces shadows and reveals detail |
| Capture | Use tripod, consistent exposure, timed intervals | Improves comparability across timepoints |
| Annotate | Add concise captions and arrows | Connects photo to claims and analysis |
Using 3D Process Photos to Improve Analysis and Grades
Good photos do more than document—they enable deeper analysis. By studying different angles and timepoints you can quantify growth, measure movement, and identify anomalies. For example, in AP Biology you might compare the angle of leaf curl across treatments; in AP Physics you could extract position data from sequential frames to calculate velocity.
When you include these images in your lab report, highlight what the images let you observe that numbers alone cannot. Visual evidence often clarifies ambiguous text and reduces the number of follow-up questions a grader might have.
Sparkl’s Personalized Tutoring: How Visual Documentation Fits into Better Learning
Many students find that personalized guidance makes the difference between taking photos and turning them into powerful evidence. Services like Sparkl offer 1-on-1 guidance and tailored study plans that include help with experimental design, documentation strategies, and interpreting visual data. With expert tutors and AI-driven insights, Sparkl can help you select the most meaningful frames, annotate them for clarity, and weave them into a narrative that meets AP expectations.
That human feedback—paired with targeted practice—helps you avoid common mistakes, refine your methodology, and present your work in a way that graders recognize and reward.
Assessment-Ready Examples: Turning Photos into Stronger Claims
Below are examples of how a single image or short sequence can be turned into assessment-ready evidence:
- Observation: “Crystals appeared at 24 hours.” Photo evidence: side and top views at 0, 24, and 48 hours with scale and caption stating crystallization onset. Assessment use: supports claims about nucleation timing.
- Observation: “Optics alignment permitted minimal light leakage.” Photo evidence: top-down shots showing beam path, alignment marks, and a final intensity reading. Assessment use: validates experimental setup before data collection.
- Observation: “Sculptural armature supported clay expansion.” Photo evidence: sequential photos showing internal support and final pose. Assessment use: explains technical decision-making in an AP Studio Art portfolio.
Ethics, Permissions, and Academic Integrity
When collecting images for AP submissions, respect privacy and safety. Don’t include identifiable faces without permission. For human subjects, follow your school’s guidelines and any IRB-like requirements your teacher sets. Always report any assistance or tools you used to capture or process images—transparency strengthens your credibility.
Future-Proofing Your Visual Evidence
Keep originals. Save metadata and timestamps. If you edit photos, preserve the originals in a compressed archive and clearly label edited versions. Digital files are fragile—back them up to cloud storage or an external drive so your evidence remains accessible on demand.
Closing Thoughts: Turning the Invisible Visible—And Smart
3D process photos are a simple but powerful way to elevate your AP work. They make invisible steps visible, turn fleeting moments into evidence, and communicate your thought process to graders in a way that words alone often cannot. With careful planning, consistent technique, and clear annotations, your sequences will not only document what you did but also show why it mattered.
If you want to go further, consider pairing your efforts with personalized tutoring. A tutor can help you pick the most meaningful frames, craft captions that tie images to claims, and develop a study plan that puts these visual techniques at the center of your practice—Sparkl’s tailored guidance and AI-driven insights can accelerate that growth.
Start small: pick one project this week and create a 3D sequence. Use a ruler, pick three consistent angles, and write a one-line caption for each photo. Once you get comfortable, your documentation will grow into a habit—and that habit is one more advantage when it’s time to show your best work to AP graders, teachers, or colleges.
Make the invisible visible, tell your process clearly, and let your evidence speak for your thinking. That’s how great science, art, and research are communicated—frame by frame.
End of article.


No Comments
Leave a comment Cancel