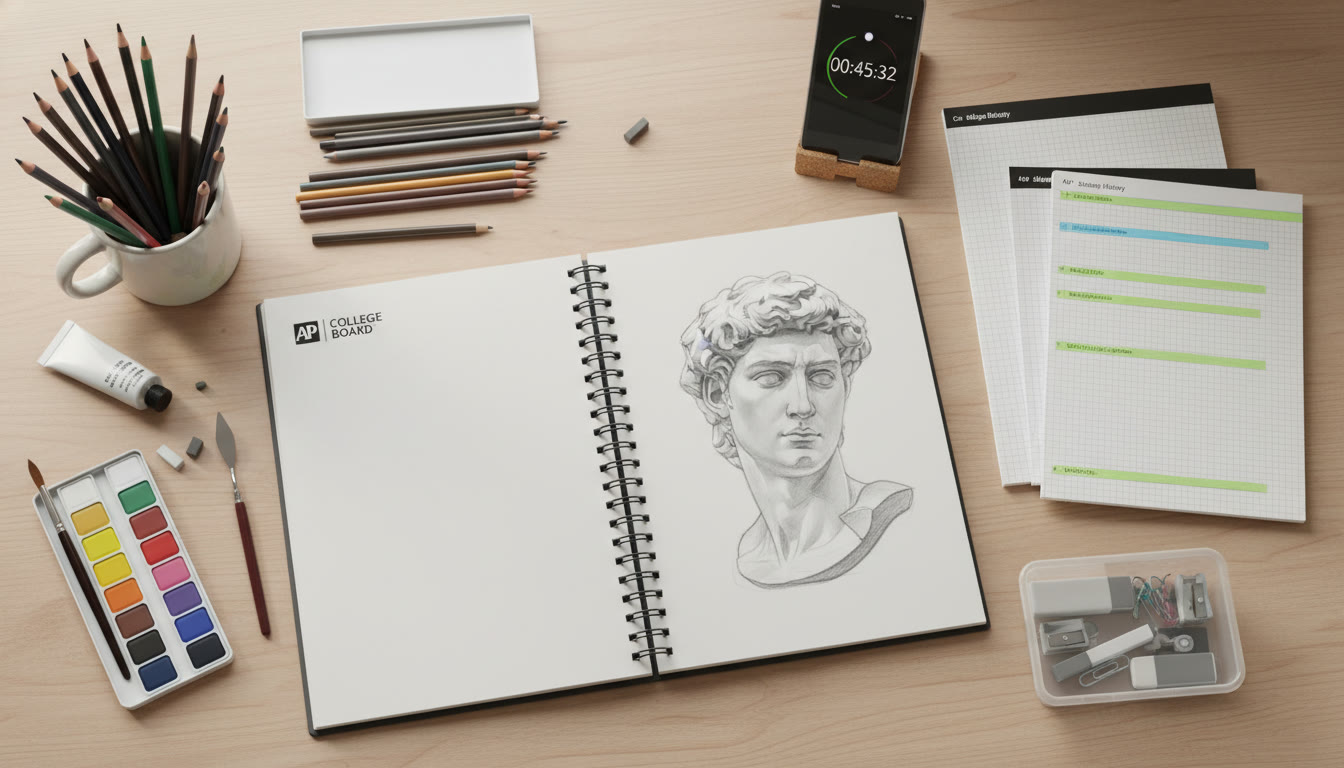
Introduction: Smart Spending for Creative Success
Preparing for AP Art or building a consistent studio practice as a busy high-school student means more than talent and time — it also means making smart, intentional choices about what you buy. Art supplies are everywhere: tempting, shiny, and expensive. But the truth is you don’t need the most expensive brands for everything, and splurging in the right places yields exponential returns in your work. This guide helps you decide where to spend and where to save, so your budget supports growth, strong AP portfolio pieces, and joyful making.

Why Budgeting Matters for AP Students
AP Art requires not only technical skill and conceptual maturity, but also a consistent body of work. That often means repeated experimentation, revisions, and several final pieces. A thoughtful budget:
- Keeps your practice sustainable across the semester.
- Helps you prioritize materials that improve the quality of your AP submissions.
- Reduces decision fatigue — you know when to invest and when to improvise.
Budgeting also creates room for learning: if you save on expendables, you can afford a workshop, a quality mentor session (for instance with a service like Sparkl’s personalized tutoring), or a better camera to document your portfolio.
Principles to Guide Where You Spend and Where You Save
Before we get into categories, here are four practical principles that I recommend every student use when deciding whether to splurge or scrimp:
- Function over Brand: Prioritize what the tool does for your work rather than the brand name.
- Longevity and Frequency: Spend more on items you’ll use every day (e.g., a sketchbook or a quality set of pencils), save on one-off supplies.
- Learning Leverage: Invest where a better tool meaningfully improves learning — for example, a reliable easel or accurate color materials that teach color mixing.
- Test First: Try inexpensive versions for a season. If you use them extensively, upgrade later.
Category-by-Category Guide: Spend or Save?
1. Drawing Materials (Pencils, Erasers, Charcoal)
Verdict: Spend moderately on pencils and erasers; save on single-use charcoal packs at first.
Pencils are the backbone of drawing — a well-graded set (from 6H to 6B) is worth the modest investment because it supports tonal range and precision. A quality kneaded eraser and a plastic eraser matter more than the fanciest pencil case. For charcoal, inexpensive compressed charcoal sticks are fine for practice; if you fall in love with it, upgrade to artist-grade sticks for final pieces.
2. Paper and Sketchbooks
Verdict: Spend on final-piece paper; save on practice sketchbooks.
Use economical sketchbooks (newsprint, mixed-media pads) for studies and thumbnailing. Reserve heavier, archival paper for final or portfolio pieces — acid-free, heavyweight paper will hold up for submissions and photography. Buying good paper only when needed reduces waste and stretches your budget.
3. Painting Supplies (Acrylic, Oil, Watercolor)
Verdict: Save on secondary colors and student-grade paints; spend on a few key pigments and quality brushes.
Student-grade paints are serviceable for most exercises and early portfolio work. But invest in a handful of permanent pigments you use often (for example, a high-quality ultramarine blue or a reliable cadmium substitute). Brushes are worth spending on: a few well-made round and flat brushes keep their shape and reduce frustration. For oil painting, invest in safety (proper ventilation) and in a good solvent alternative if your space demands it.
4. Printmaking and Specialty Media
Verdict: Save by using community resources or school studios; spend if a technique becomes central to your AP concentration.
Printmaking equipment can be expensive. If your school has a press or you can access a community studio, use those resources. If printwork becomes a cornerstone of your portfolio, budget for quality inks and paper then.
5. Tools for Photography and Documentation
Verdict: Spend smartly — documentation quality matters as much as the artwork itself for AP submissions.
Good images can make or break how your work reads digitally. You don’t need a pro camera: a smartphone with a steady tripod, natural diffused light, and a simple reflector works incredibly well. If documentation is a consistent bottleneck, splurge on a tripod, a daylight-balanced lamp, or a remote shutter. Consider allocating part of your budget to a short session with someone who can teach you simple lighting and cropping techniques (for instance, a session through Sparkl’s personalized tutoring could help here), because learning to present your work strongly is an investment in your grade and college portfolio.
6. Studio Furniture and Storage
Verdict: Spend on ergonomics; save by repurposing household items for storage.
A sturdy table and a supportive chair prevent injury and improve concentration. An easel is worth buying if you work upright often. For storage, reuse jars, shoe boxes, and repurposed shelving. Good organization reduces waste and prevents duplicate purchases.
7. Consumables (Tape, Glue, Fixative, Canvases)
Verdict: Save on consumables until you find favorites; buy canvases and surfaces carefully for final pieces.
Consumables add up. Buy adhesives, tape, and masking supplies in multipacks. For canvases and panels, choose archival options for final pieces and cheaper stretchers for studies. Seal sprays and fixatives should be chosen thoughtfully — cheaper sprays can alter color or produce uneven finishes.
Sample Budget Breakdown: A Typical Semester Kit
Below is a sample budget for a high-school student preparing for AP Art over a 16-week semester. Adjust numbers to reflect your local prices and needs.
| Category | Suggested Budget | Rationale |
|---|---|---|
| Drawing Set (Pencils, Erasers, Sharpener) | $20–$40 | Gradation matters; mid-priced set lasts a season. |
| Sketchbooks and Practice Paper | $15–$35 | Economical paper for daily work. |
| Paints and Brushes | $40–$120 | Student-grade paints plus a few higher-quality pigments and 3–5 brushes. |
| Canvas / Final Surfaces | $30–$100 | Archive-quality for final pieces; cheaper for studies. |
| Documentation Tools (Tripod, Lighting) | $25–$100 | Small tripod and lighting tools; improves submission quality. |
| Fixatives, Adhesives, Consumables | $20–$50 | Buy multi-packs and test before committing to expensive brands. |
| Storage and Furniture (partial) | $20–$80 | Basic table, chair, or easel upgrades as needed. |
| Workshops / Tutoring (optional) | $50–$200 | Targeted help (like Sparkl’s personalized tutoring) can do more for your portfolio than random splurges. |
| Total (Approx) | $220–$725 | Ranges vary by needs and local pricing. |
How to Trim Costs Without Sacrificing Quality
Trimming costs is about creativity and community. Here are practical ways to reduce spending while maintaining high-quality output.
- Share Supplies: Form a supply co-op with classmates — sharing expensive items like brayers, specialty primers, or a projector makes sense.
- Thrifting and Repurposing: Frames, jars, boards, and furniture are often available in thrift stores and save a ton.
- Buy in Bulk for Consumables: Masking tape, sandpaper, and glue are cheaper when bought in larger quantities.
- Use School Resources: Make the most of school studios, darkrooms, or print rooms for expensive processes.
- Swap and Sell: Sell or swap supplies you no longer use — you’d be surprised what your classmates need.
When to Upgrade: Signs That a Higher-End Tool Is Worth It
It’s tempting to test everything on the cheap. Upgrade when:
- You use a tool daily and its limitations frustrate your process.
- A better-quality tool directly improves a portfolio piece (e.g., a brush that holds paint and keeps its edge for fine lines).
- Your medium is central to your AP concentration and archival quality matters for grades and future college submissions.
Upgrading intentionally — not impulsively — keeps your studio evolving while protecting your bank account.
Quality vs. Quantity: Building a Minimal but Complete Kit
For AP students, having a small kit that covers many techniques is smarter than a big kit full of unused items. Think ecosystem over inventory: a few versatile paints, a trio of good brushes, reliable pencils, and a dependable surface will support exploration and refinement.
Minimal Kit Example
- H–6B pencil set
- Kneaded and vinyl erasers
- Two practice sketchbooks (one for thumbnails, one for studies)
- Five reliable brushes (small round, medium round, small flat, medium flat, mop)
- A small palette of pigments (one warm and cool of each primary)
- Tripod and daylight lamp for documentation
- Storage box and basic framing materials
Practical Examples: Real Decisions Students Make
Here are three short scenarios that show how the spend/save rules work in real life.
Scenario A: The Aspiring Painter
Jamie paints daily in acrylic and struggles with color mixing. Instead of buying every color, Jamie spends on a set of professional-quality ultramarine and burnt sienna and a dependable set of brushes, then saves by using student-grade tubes for secondary colors. Result: better color depth and fewer paint-related frustrations.
Scenario B: The Mixed-Media Experimenter
Riley loves texture and collage. Riley saves by buying inexpensive adhesives and repurposed materials, but spends on archival varnish and a studio-grade glue for final pieces. Outcome: creative exploration without compromising final stability.
Scenario C: The Photo-Based Artist
Morgan relies on strong documentation. Morgan invests in a tripod, a reflector, and a short tutoring session to learn lighting and cropping techniques — a small expense that transforms portfolio images. Sparkl’s personalized tutoring could be a natural fit here, offering targeted help to level up documentation skills efficiently.
Organizing Purchases: A Seasonal Buying Plan
Break purchases into three seasons to ease the financial load and keep your kit evolving with your practice.
- Pre-Semester: Essentials — drawing set, sketchbooks, basic paints, tripod.
- Mid-Semester: Upgrade as needed — better brushes, specialty pigments, canvas for final pieces.
- End of Term: Documentation upgrades, framing, varnish — prepare for portfolio submission.
Smart Shopping Tips and Where to Look
Smart shopping is half the battle. Here are practical habits that save money and reduce regrets.
- Read ingredient lists and labels — especially for paints and fixatives — to avoid surprises.
- Compare per-unit price (per ounce, per sheet) rather than package price for true value.
- Watch for student discounts and school supply drives.
- Keep a running inventory to avoid duplicate purchases.
- When possible, test small sample sizes before committing to large tubes or expensive paper.
Final Thoughts: Your Budget, Your Practice
Budgeting for art supplies is not about austerity — it’s about shaping the conditions under which your creativity grows. The best budgets are flexible: they protect essentials, allow for joyful splurges when they matter, and make room for targeted learning investments. Whether it’s a set of reliable brushes, a good tripod to document a breakthrough piece, or one-on-one guidance from a tutor, each dollar you spend should move you closer to a stronger AP portfolio and deeper artistic skill.
One last practical note: keep a small “flex fund” for unexpected opportunities — a discounted workshop, a rare pigment, or a short tutoring session that teaches a technique that transforms your work. Often, a well-timed, modest investment in learning (for example, Sparkl’s personalized tutoring that offers 1-on-1 guidance and tailored study plans) yields more long-term returns than a pile of unused supplies.
Quick Checklist Before You Buy
- Will this tool be used weekly, or just once for an experiment?
- Does this purchase replace or complement something I already own?
- Can I borrow or test this from school or a friend first?
- Is this purchase improving my final-image quality or my ability to learn?
- Do I have storage and a plan for using this item effectively?
Resources to Build Momentum
Use your school resources, peers, and occasional tutoring to amplify the value of every purchase. Targeted coaching — especially sessions that help with portfolio focus, documentation, and technical problems — can turn supply purchases into visible improvements on your AP submission. Keep track of what works, and refine your kit each semester.
Closing: Spend With Intention, Create With Joy
Balancing quality and affordability is an art in itself. When you align purchases with learning goals and the demands of your AP concentration, every tool becomes a means to a creative end instead of clutter. Spend thoughtfully, save cleverly, and let your budget serve your practice rather than constrain it. Your strongest work — built over time, with purposeful tools and intentional learning — will show it.
Now get out there: sketch, experiment, document, and refine. When you need a focused push — whether it’s portfolio feedback, documentation coaching, or a tailored study plan — consider short-term, high-impact options like personalized tutoring to accelerate progress. Your art, and your future, are worth the plan.


No Comments
Leave a comment Cancel