Why visualization matters before the Digital SAT
Picture this: you walk into the testing room with steady breathing, you know exactly how you’ll tackle the first reading passage, and when the adaptive block asks something tricky, your mind doesn’t race — it calmly reaches for the strategy you rehearsed. That mental clarity didn’t happen by chance. It was built, deliberately, through visualization.
Visualization is not magic. It’s a cognitive tool athletes, musicians, and high-performing students use to rehearse success before it happens. For the Digital SAT — taken on Bluebook with adaptive sections and time pressure — visualization helps in three critical ways:
- Reduce anxiety: mentally rehearsing test-day logistics and success scenarios lowers the “what-ifs” your brain might otherwise amplify.
- Boost preparedness: visual rehearsals strengthen the specific habits you want to use: pacing, annotating, skipping strategically.
- Improve focus: a practiced pre-test script filters distractions so you can apply knowledge when it counts.
How visualization works — the science in plain language
When you vividly imagine an action, your brain activates many of the same neural pathways used when you actually perform that action. That means rehearsing the test in your mind can make your real behavior smoother, faster, and more automatic. It’s similar to running through a musical piece in your head: you might not be moving your fingers, but your brain still strengthens the pattern.
For students, this is especially helpful because the SAT measures both knowledge and test-taking skills. Visualization helps lock in the test-taking skills — timing strategies, annotation habits, and calm decision-making — so your content knowledge has a clearer runway to show itself.
When to use visualization in your SAT prep schedule
Visualization is flexible. Here’s a practical schedule that fits most study plans:
- Daily (5 minutes): a quick race-through of your ideal study session or the first 10 minutes of a test block.
- Pre-practice test (10–15 minutes): run the full mental checklist before you take a practice test on Bluebook.
- Night before test day (15–20 minutes): a calm rehearsal of arrival, checking your device, and walking into the testing room confident.
- Test morning (5 minutes): a short breathing and visualization routine in the car or waiting area.
These small investments compound. The more you pair realistic practice tests with visualization, the more natural the real test will feel.
Step-by-step visualization exercises you can start tonight
1) The Entry Sequence (5 minutes)
Purpose: eliminate logistical anxiety and give yourself a calm starting point.
- Sit comfortably, close your eyes, and take three slow breaths.
- Imagine unlocking your device, opening Bluebook, and seeing your name on the screen. Picture the admission ticket and the proctor’s script — everything looks normal and manageable.
- Visualize walking to your seat and placing your permitted items (ID, admission ticket) exactly where they should be. Feel your shoulders relax.
2) The First 10 Minutes Drill (8–10 minutes)
Purpose: rehearse the mental routine you’ll use to set tone and pace for the whole test.
- Close your eyes and imagine the test starting. Hear the timer begin; see the first reading passage on the screen.
- Mentally perform your opening checklist: read the question stem first (or the passage first, based on your strategy), underline the main claim, quickly annotate structure, and select the best first-pass answers for easy questions.
- Picture yourself pacing: if you plan 10 minutes per passage, imagine glancing at the timer and smoothly moving on after that window.
3) The Obstacle Rehearsal (10 minutes)
Purpose: prepare for the inevitable tough question without panic.
- Visualize encountering a difficult problem. Notice the initial spike of frustration, then imagine stepping through a practiced decision tree: rephrase the question, eliminate two answers, make a best guess if time is low.
- Rehearse the calming response: three deep breaths, a short mental reminder (“one question, not the whole test”), and moving on if the time cost is too high.
4) The Finish-Line Scene (5 minutes)
Purpose: end each test block positively and confidently.
- Visualize completing the last question in a block. Imagine quickly reviewing your flagged items, making final choices, and clicking through to submit that section.
- See yourself standing, stretching, and walking out of the room energized rather than drained.
Sample pre-test visualization script you can record and replay
Recording your own voice can make the visualization feel vivid and private. Here’s a script (about 6–8 minutes) you can record and use before practice tests or on test day morning:
“Close your eyes. Breathe slowly. Imagine today: you woke up at your planned time, had the breakfast you practiced, and packed your device. You arrive at the test center and check in smoothly. You open Bluebook and see your name — everything is correct. You feel calm. You open the first section. The first questions feel familiar; you answer the easy ones confidently. When you see a hard one, you pause, re-read, eliminate two options, and either answer or flag it for review if time allows. You keep an even pace, glance at the timer at regular intervals, and stick to your plan. At the end of each block you review quickly, submit calmly, and move to the next block with energy. When the last question is done, you close the test and feel proud — you executed your plan. Breathe in, breathe out. Remember: you prepared for this.”
Practical tips to make visualization more effective
- Be specific: visualize the exact screen layout, the Bluebook header, the act of highlighting or circling answers. The more detail, the stronger the brain’s rehearsal.
- Pair visualization with actual practice: immediately follow a visualization session with a short practice set on Bluebook. The link between imagined and real actions is what creates habit.
- Include sensory details: notice the weight of the device, the sound of the proctor’s instructions, or the faint hum of the room. This anchors the visualization in reality.
- Use “if… then” plans: visualize specific contingencies. If you run out of time on a math grid-in, then you flag and move on. Rehearse the emotional tone for each contingency: calm, clear, and decisive.
Example study-week using visualization + practice
Below is a sample short plan that mixes visualization, targeted practice, and review. Adapt timing to fit your calendar.
| Day | Morning | Afternoon/Evening |
|---|---|---|
| Monday | 5-min visualization: Entry Sequence | 45–60 mins targeted practice (reading passages); review mistakes |
| Wednesday | 10-min visualization: First 10 Minutes Drill + recorded script | Full timed reading practice (Bluebook sample); note pacing |
| Friday | 10-min visualization: Obstacle Rehearsal | Practice difficult problem types (grid-ins, advanced grammar); review strategies |
| Saturday | 15-min visualization: Full test morning routine | Full practice test on Bluebook; post-test reflection + confidence check exercise |
How to combine visualization with active learning
Visualization works best when it complements, not replaces, active learning. Pair these techniques with:
- Deliberate practice on weak content areas.
- Timed sections to build pacing muscle memory.
- Reflection journals where you note what your visualization included and how it matched reality.
For example, if grammar questions trip you up, visualize yourself scanning a sentence and quickly naming the error (subject-verb agreement, parallel structure, etc.). Then do a short targeted set of grammar questions to reinforce the pattern.
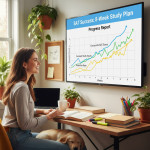
Measuring progress: simple metrics that matter
Visualization feels subjective, so pair it with small, measurable checks. Use this table to track improvement over a month:
| Metric | Week 1 | Week 4 | Goal |
|---|---|---|---|
| Average time per reading passage | 12:30 | 10:15 | 9:00–10:00 |
| % of flagged math questions answered correctly on review | 60% | 78% | 85%+ |
| Self-rated test-day calm (1–10) | 5 | 8 | 8–9 |
Those numbers are examples. Your progress will depend on baseline skills and how consistently you practice.
Real-world examples: how visualization helped three students
These condensed stories show how students used visualization in different ways.
- Amira, the time-manager: She used the First 10 Minutes Drill daily and shaved two minutes off each reading passage by Week 3. Visualization reduced her impulsive double-checking, so she finished sections with time to spare.
- Daniel, the anxious test-taker: By rehearsing the Entry Sequence and Finish-Line Scene, he found his morning anxiety dropped. On test day he described feeling “surprisingly normal” — a direct effect of having run the scenario in his mind many times.
- Sophia, the problem-solver: She practiced Obstacle Rehearsal for hard math problems and developed a stepwise fallback: quick reframe, elimination, and strategic guess. Her accuracy on flagged questions rose noticeably.
When visualization alone isn’t enough
If you find visualization helps your calm but not your scores, check for these gaps:
- Not enough deliberate practice on content gaps (e.g., certain algebra skills).
- Poor timed-practice alignment with the digital format (use Bluebook and official practice materials).
- Lack of feedback — you need targeted correction, not just rehearsal.
In those cases, combining visualization with tailored instruction can accelerate progress. For many students, working 1-on-1 with a tutor who builds a study plan that blends practice and visualization makes the difference. Sparkl’s personalized tutoring, for example, pairs expert guidance with tailored study plans and AI-driven insights to create visualization-friendly routines that fit your strengths and weaknesses.
Practical checklists: what to visualize the night before and the morning of your Digital SAT
The night-before visualization checklist
- Device charged and Bluebook tested on the chosen device.
- Admission ticket, photo ID, and permitted items packed.
- Route and timing to the test center rehearsed — know the parking, entrance, and room.
- Sleep plan: a consistent bedtime and phone-off routine.
The test-morning visualization checklist
- Preview a short recorded visualization (Entry Sequence + First 10 Minutes).
- Simple breakfast you practiced; avoid new foods.
- Calming breathing exercise: inhale 4, hold 2, exhale 6 — three cycles.
- Arrive early, check in, take a deep breath, and begin your entry routine.
Frequently asked questions about visualization for the SAT
Does visualization really change test scores?
Visualization won’t replace content knowledge, but it reliably improves test-taking behaviors: pacing, stress management, and decision-making. Those behavioral improvements can produce meaningful score gains when paired with solid study.
How long should a visualization session be?
Even five minutes daily helps. Aim for 5–20 minutes depending on the day: quick run-throughs on study days and longer rehearsals before full practice tests.
Can I visualize on the way to the test center?
Yes. A short pocket routine — breathing and a 2–3 minute mental checklist — is perfect for the car or bus. Keep it calm and focused.
Putting it together: a personalized plan you can try next week
Try this compact 7-day micro-plan. It combines visualization, targeted practice, and review.
- Day 1: Record a 6-minute visualization script; 30 mins targeted reading practice.
- Day 2: 5-minute Entry Sequence; 40 mins math review (focus: algebra).
- Day 3: 10-minute Obstacle Rehearsal; timed grammar set + review.
- Day 4: 5-minute First 10 Minutes Drill; full timed reading section.
- Day 5: 10-minute Finish-Line Scene; error log review (identify recurring mistakes).
- Day 6: Full practice test on Bluebook (use your recorded visualization before starting).
- Day 7: Reflection day — journal how reality matched visualization and adjust your mental script for next week.
If you prefer guided support, consider a short series of 1-on-1 sessions where a tutor helps you craft and test your visualization scripts, aligns them with your study plan, and uses data to refine the routine. Sparkl’s personalized tutoring blends expert tutors, AI-driven insights, and tailored study plans — which many students find helpful in turning visualization into measurable score improvements.
Final thoughts: visualize with purpose
Visualization for the Digital SAT is a high-return, low-effort practice. It calms the mind, refines the behaviors that matter under pressure, and helps your knowledge shine when it counts. Make your visualizations specific, practice them regularly, and pair them with realistic Bluebook practice. Over time those rehearsed habits become second nature on test day — and that’s when preparation becomes performance.
Ready to try a recorded script or build a tailored visual routine? Start small, be consistent, and let each calm rehearsal compound into real test-day confidence.


No Comments
Leave a comment Cancel