
Why a Dual-Use Lab Notebook Matters
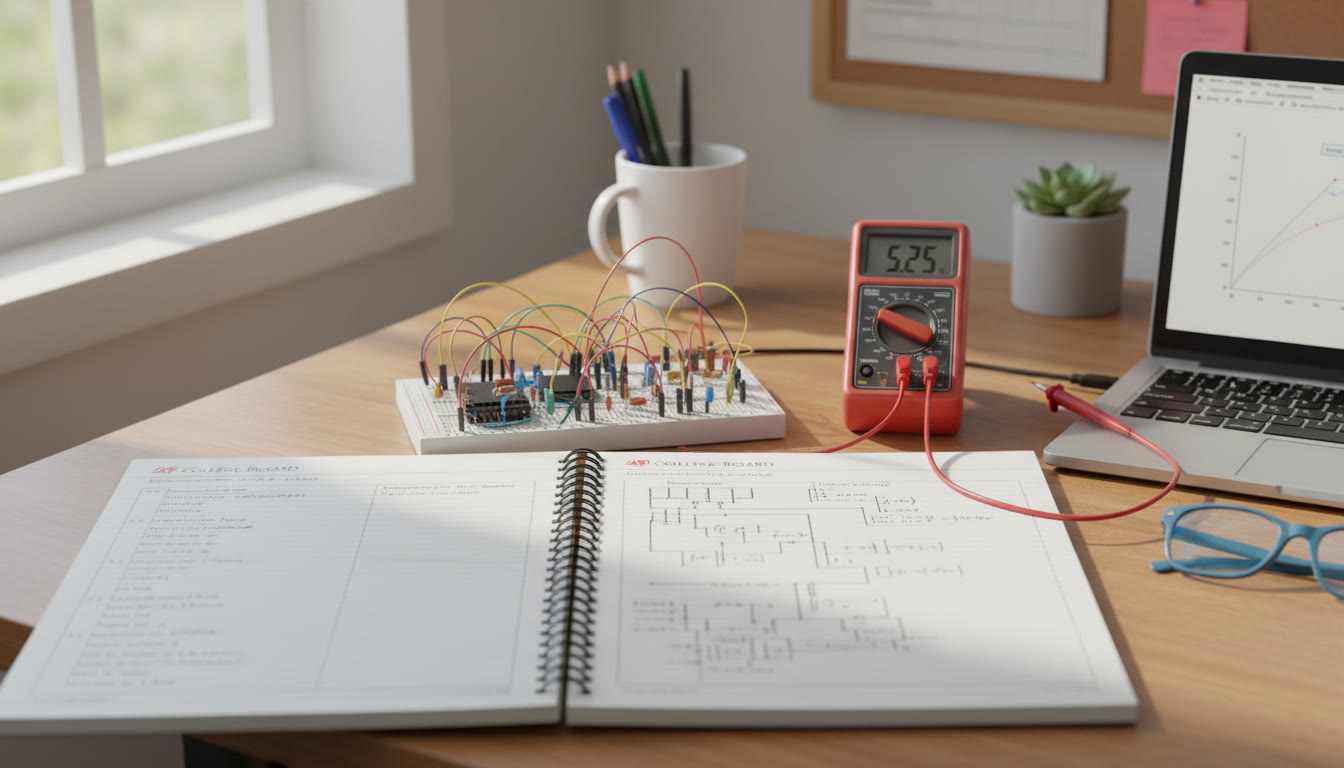
Imagine opening a single notebook and finding everything you need for both the messy, creative joy of building boards, circuits, or devices and the precise, evidence-driven write-ups AP teachers and exam graders expect. That is the power of a dual-use lab notebook: it bridges hands-on making with disciplined scientific reporting. Whether you’re soldering an Arduino board, running a titration in AP Chemistry, or setting up an ecology transect for AP Environmental Science, the right notebook saves time, improves learning, and gives you a clear, defensible record of what you did and why.
Who this guide is for
This guide is written for high school students preparing for AP (Advanced Placement) science courses and their parents. It will help you build a notebook that meets classroom expectations and supports real-world making and engineering projects. If you’re preparing for AP exams, doing science fair projects, or simply love tinkering, these practical tips will make your documentation smarter and your study time more efficient.
Core Principles of a Dual-Use Notebook
Before we dive into templates and practical tips, let’s establish the core principles that make a notebook genuinely useful for both board-building and AP science work.
- Clarity: Each entry should be readable by someone who wasn’t there. Clear dates, titles, and objective statements are essential.
- Continuity: Use a table of contents and consistent numbering so you can quickly find past experiments or iterations of a build.
- Evidence: Record raw data, photos (or descriptions), and intermediate observations. This is what AP graders and teachers look for when judging lab work.
- Reflection: Write short notes about what worked, what didn’t, and why. Reflection turns experiments into learning.
- Reproducibility: Include enough detail that you—or someone else—could reproduce the experiment or build from the notebook alone.
Layout and Sections: One Notebook, Many Uses
A notebook that supports both board projects and AP labs should be structured but flexible. Here is a recommended layout you can adapt to your class requirements and personal preferences.
Suggested Notebook Structure
- Front Matter: Title page, student name, contact info, course and teacher name, semester dates.
- Table of Contents (TOC): Reserve at least two pages at the beginning. Number pages and update the TOC after each new major entry.
- Project/Lab Entries: Each entry should follow a consistent sub-structure (see templates below).
- Appendices: Datasheets, references, common conversion tables, and a component inventory for board projects.
- Index or Tags: On the last pages add an index of key topics (e.g., potentiometer calibration, pH buffer prep, microcontroller pinout).
Daily Entry Template: The Building Block
Use a daily entry template that can be adapted for quick bench notes or full lab reports. Print or write the headings so entries stay consistent.
Daily Entry Template (Use for Boards & Labs)
- Date and Page Number: Essential for continuity.
- Title: Keep it short and descriptive (e.g., “pH Buffer Prep + Sensor Calibration” or “LED Matrix: First Prototype”).
- Objective / Question: One sentence stating the goal (e.g., “Calibrate pH sensor against known standards” or “Test continuity of solder joints on the power rail”).
- Materials / Components: List everything used with part numbers if relevant.
- Method / Procedure: Step-by-step enough to reproduce; note deviations from protocol.
- Observations / Data: Raw numbers, times, voltages, pictures (or image descriptions), annotated sketches.
- Analysis / Interpretation: Short calculations, graphs, or conclusions from the data.
- Next Steps: What you’ll do next session or suggestions for improvement.
- Reflection (1–3 sentences): What surprised you? What concept did this reinforce?
Example Entries: Concrete Models
Here are two condensed examples: one for a board-building session and one for an AP lab entry. Keep them in the same notebook side-by-side; over time you’ll see cross-pollination of skills and ideas.
Example: Board-Building Session
Date: September 12, 20XX — Title: Soldered Power Rail and Voltage Regulator Test
- Objective: Establish a stable 5V rail for microcontroller and test thermal behavior under load.
- Materials: LM7805 regulator, 10uF electrolytic caps, perfboard, 5V bench supply, multimeter, thermal probe.
- Procedure: Soldered regulator to perfboard with decoupling caps; connected 9V input; measured output every 5 minutes under 300mA load.
- Observations: Initial output 4.98V; drifted to 4.92V after 20 min; thermal probe at regulator case = 48°C.
- Analysis: Voltage drop within acceptable tolerance; thermal rise suggests need for heat dissipation if continuous load >300mA. Calculated power dissipation = (9V–5V)*0.3A = 1.2W.
- Next Steps: Add small heatsink, or test switching regulator alternative.
- Reflection: Good demonstration of why regulator selection matters for battery projects.
Example: AP Lab Entry (Condensed)
Date: October 4, 20XX — Title: Rate Law Determination for Reaction A + B → C
- Objective: Determine reaction order with respect to A and B.
- Materials: 0.1 M solutions A and B, spectrophotometer, cuvettes, stopwatch.
- Procedure: Performed three trials varying [A] while holding [B] constant; measured absorbance vs time every 30 s.
- Data: Included raw absorbance values and converted to concentration using calibration curve.
- Analysis: Log-log plot slope ≈ 1.0 for [A] and slope ≈ 2.0 for [B] — rate = k[A][B]^2. Showed short calculation steps.
- Conclusion: Reaction is first order in A and second order in B. Error analysis discussed possible systematic errors in mixing time.
- Reflection: Mixing speed significantly influenced initial rates — improved technique next time.
Tables You Should Keep in Your Notebook
Tables make data readable and compact. Below is a useful table layout that works for both lab runs and iterative board tests.
| Entry Date | Title | Objective | Key Results | Next Action |
|---|---|---|---|---|
| 202X-09-12 | Power Rail Test | Create stable 5V | 4.98V → 4.92V, 48°C | Add heatsink or switch regulator |
| 202X-10-04 | Rate Law | Determine orders | Rate = k[A][B]^2 | Repeat with faster mixing |
Practical Tips: Making Your Notebook Work for AP Exams
Teachers and AP graders appreciate notebooks that show critical thinking. Here’s how to turn your dual-use notebook into a study engine for AP exams.
- Highlight Core Concepts: Tag entries with key concepts (e.g., Conservation of Energy, Equilibrium, Ohm’s Law). When studying, filter by tags to review practical examples of topics.
- Convert Observations into Practice Questions: After an entry, write one or two short exam-style questions based on your data. Answer them later as active review.
- Keep Short Summaries: At the start of each week, write a 150–200 word summary of what you learned. These are gold for quick exam review.
- Use the Appendix for Equations and Constants: Put frequently used equations and calibration constants there so you won’t forget them during exam prep.
Balancing Detail with Time: How Much to Record
One common dilemma is how detailed entries should be. You don’t need a novel for every session, but skimming and missing details make later study harder. Use a tiered approach:
- Quick Sessions (15–30 min): Title, objective, one-sentence method, key data, one-line reflection.
- Standard Labs (45–90 min): Full daily template with raw data and short analysis.
- Major Projects/Reports: Extend entries into multi-page reports; cross-reference earlier short entries in the TOC.
Digitizing Your Notebook: When and How
A physical notebook is reliable, but digitizing photos or transcribing summaries into a cloud document makes searching and studying faster. If your teacher allows digital copies, consider the following workflow:
- Photograph key pages and upload them to a dedicated folder.
- Transcribe the TOC and tag entries with keywords.
- Create a short weekly review document that collects reflections and practice questions.
Sparkl’s personalized tutoring can help students design this digital workflow, offering tailored study plans and AI-driven insights about which notebook entries to prioritize when preparing for AP exam topics.
Using Your Notebook for Lab Practicals and Assessments
Many AP classes include practical assessments or projects. Your notebook is the primary evidence of your experimental thinking. When teachers assess practical skills, they look for:
- Clear objectives and hypothesis.
- Accurate, well-organized data.
- Logical analysis and valid conclusions.
- Evidence of reflection and error analysis.
Include brief notes on safety precautions and ethical considerations where relevant (e.g., handling chemicals or biological samples). These small entries demonstrate responsibility and awareness.
Study Strategies Built Around the Notebook
Transforming your notebook into an effective study tool is about turning recorded experiences into active recall opportunities. Here are practical study strategies.
Weekly Review Sessions
- Spend 30–60 minutes each week reviewing recent entries.
- Write one sample exam question per entry and answer it without referring to notes.
- Summarize the week in 200 words and flag topics that need reinforcement.
Exam Countdown: 4-Week Plan
Use the notebook to guide focused revision during the last month before an AP exam:
- Week 4: Refresh core concepts by reading summaries and key entries.
- Week 3: Practice problem-solving for topics that had experimental data in your notebook.
- Week 2: Time yourself doing FRQ-style questions inspired by your experiments.
- Week 1: Rapid review of flagged entries, formulas, and one final mock exam.
How To Present Your Notebook for Grading or Interviews
If you’re submitting your notebook for a project grade, science fair, or college interview, presentation counts. Here’s how to make your notebook professional while keeping it authentic.
- Ensure the TOC is complete and page numbers are correct.
- Include a short abstract or project summary at the front of multi-week projects.
- Use legible handwriting or type key sections and attach printed pages.
- Include clear photo descriptions if photos are not permitted; annotate them in the notebook.
Common Mistakes and How to Avoid Them
Students often make avoidable errors that undermine the usefulness of a notebook. Watch for these:
- Incomplete Data: Not recording units, timestamps, or conditions. Fix: Always include units and conditions in the data row.
- Messy TOC: Forgetting to update the table of contents. Fix: Make TOC updates part of your closing routine.
- No Reflection: Leaving out what you learned. Fix: Force a one- or two-line reflection at the end of each entry.
- Overly Technical Without Explanation: Jargon alone won’t help you study. Fix: Add a one-sentence plain-English summary.
Tools and Supplies: What to Keep Handy
Here are practical supplies that improve notebook quality across board builds and labs:
- Bound notebook with numbered pages (helps preserve continuity).
- Ruler and fine-tip pens in two colors for headings and data.
- Small camera or phone for photos; a consistent labeling system is helpful.
- Sticky tabs for frequently referenced pages; index cards for quick summaries.
Making It Personal: Your Voice in the Notebook
A notebook should reflect your thinking. Don’t fear a conversational note at the end of an entry—these personal moments reveal learning. Teachers and future readers appreciate concise reflections like “I didn’t expect the sensor to drift this much; next time I’ll pre-heat it for 10 minutes.” These lines are small but powerful pieces of evidence that you engaged critically with the work.

How Sparkl’s Personalized Tutoring Can Fit Into Your Notebook Strategy
Personalized tutoring can accelerate the learning you document in your notebook. Tutors help you design experiments, interpret data, and turn notebook entries into effective study materials. Sparkl’s one-on-one guidance, tailored study plans, and AI-driven insights can recommend which entries to prioritize when revising for specific AP topics, or help you create practice questions directly linked to your lab work. When tutoring and a disciplined notebook come together, learning becomes more intentional and measurable.
Final Checklist: Ready to Start Your Dual-Use Notebook?
Use this checklist at the start of a semester or project:
- Buy a bound notebook with numbered pages.
- Create a clear title page and two-page table of contents.
- Print or write the daily entry template headers on a sticky sheet to keep consistency.
- Reserve 5–10 pages at the back for appendices (equations, conversions, inventory).
- Plan weekly review sessions and block them in your calendar.
- If possible, schedule periodic tutoring reviews to refine methods and analysis.
Closing Thoughts
A dual-use lab notebook is more than a log of actions; it’s a bridge between making and understanding. It transforms hands-on experiments into teachable moments and gives you a steady, evidence-based way to prepare for AP exams. With consistent entries, reflective practice, and occasional help from personalized tutors, your notebook will become one of the most powerful tools in your academic toolkit. Start simple, stay consistent, and let your curiosity drive both the build and the write-up.
Now go open a fresh page, solder or pipette with care, and write the kind of notes that future-you (and your AP teacher) will thank you for.


No Comments
Leave a comment Cancel