
Introduction: Why Line, Value, and Texture Are Your Evidence
In AP Drawing, every mark you make is a piece of evidence. Line, value, and texture don’t just describe an object — they argue for its presence, weight, material, and emotion. Whether you’re creating a sustained investigation for AP Studio Art or preparing timed works for the scoring session, learning to read and use these formal elements as proof can elevate your work from competent to compelling.
How to Read This Post
This blog will walk you through: what each element (line, value, texture) communicates; practical exercises to sharpen perception and control; ways to present these elements as intentional evidence in your AP portfolio; and a sample study plan you can adapt. Along the way you’ll find comparisons, examples, and small prompts to try immediately. If you want tailored, one-on-one coaching to accelerate progress, resources such as Sparkl’s personalized tutoring can provide targeted feedback, customized study plans, and AI-driven practice suggestions that fit into your schedule.
Section 1: Line — The First Argument
Line is the most immediate element of drawing. It’s the argument you start with: contours, gestures, directional cues, and edges. The quality of your line speaks to intent. Crisp, confident lines imply control and decision; tentative, varied lines can convey exploration, movement, or uncertainty.
What Lines Can Say
- Contour Lines: Define boundaries and silhouette; they assert the object’s edge.
- Gesture Lines: Capture movement and rhythm; they are evidence of action or posture.
- Hatching and Cross-Hatching: Build value and texture through linear repetition; they are evidence of volume and surface.
- Expressive Lines: Vary in thickness and pressure to show emotion, weight, or emphasis.
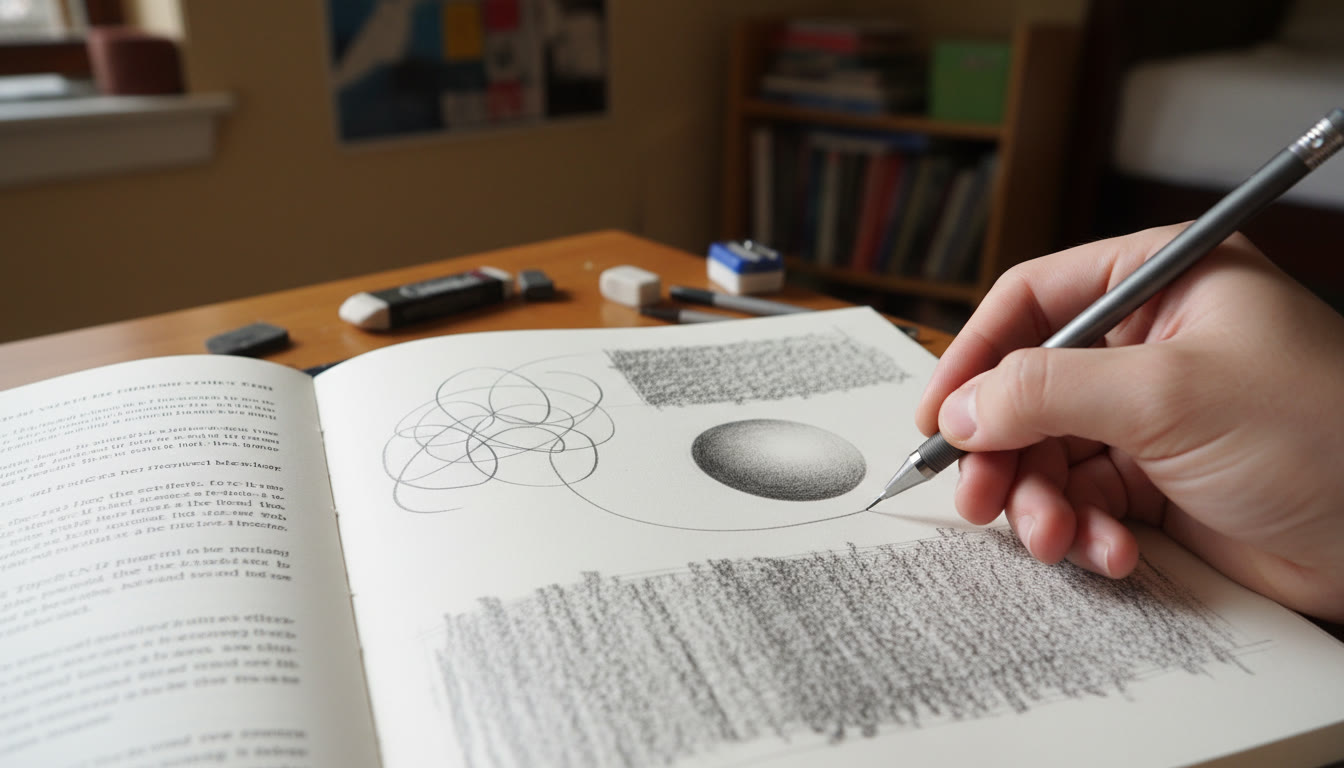
Exercises to Strengthen Line as Evidence
- Timed Gesture Series: Do 30-second, 2-minute, and 5-minute gestural studies of a live model or moving object. The faster studies force you to prioritize essential lines that communicate action.
- Contour-Only Drawing: Draw a subject without looking at your paper (blind contour) and then immediately with careful observation. Compare: the first captures attention to edge and flow; the second translates that attention into precise evidence.
- Line Weight Mapping: Take a simple form (a cup, shoe, or hand) and redraw it three times with different line weight systems—uniform, directional (light to dark), and expressive. Note how line weight changes perceived light, mass, and focus.
Section 2: Value — The Evidence of Light and Space
Value (tone) is the language of light and shadow. While line draws the path, value fills it with conviction. A convincing rendering of value tells the viewer where light falls, how surfaces curve, and where forms recede or advance. In AP Drawing, your understanding of value often separates technically proficient work from pieces with real presence.
Understanding Value Systems
Values operate on a scale: from white (highlight) to deep black (core shadow). But what matters is the relationship and proportion of values across your composition. A midtone-heavy piece reads differently than one anchored by high contrasts. Both can work—what matters is deliberate choice.
Practical Value Exercises
- Value Scales: Create 10-step and 5-step scales for graphite and charcoal. Practice matching printed swatches and then matching values from life.
- Still Life Value Blocking: Arrange three objects with distinct materials (glass, cloth, ceramic). Block in values using broad massing before adding details—this trains you to prioritize structure over detail.
- Edge Control Drill: Soften and sharpen edges between values to practice transitions. Hard edges pull forward; soft edges recede.
Section 3: Texture — Material Evidence and Tactility
Texture tells the viewer what something feels like. Is it rough, smooth, reflective, or fuzzy? Texture can be literal (a detailed rendering of fabric) or interpretive (suggesting texture with economy). In AP Drawing, texture contributes to the material narrative of your work and helps reinforce conceptual intent.
Reading Texture as Data
- Microtexture: Small-scale marks that define surface (e.g., stippling a stone).
- Macrotexture: Larger patterns or repeated forms that organize a surface (e.g., folded cloth).
- Optical Texture: Suggested texture created by value transitions and patterning rather than physical mark-making (e.g., the illusion of fur by directional strokes).
Texture-Building Exercises
- Swatch Library: Create 20-30 small swatches (2″ x 2″) of different textures—wood grain, rust, velvet, skin, glass reflections, etc. Label them and study how marks change per texture.
- Material Pairings: Draw two objects of opposing textures touching each other (e.g., glass beside burlap). The contrast sharpens the distinct qualities of each surface.
- Reduction Texture: Start with a densely textured area, then simplify it into fewer, stronger marks. This helps you decide which details are evidence and which are noise.
Section 4: Combined Practice — Making the Elements Work Together
Line, value, and texture don’t act separately in a finished drawing. They layer and support one another. The challenge is to let each element be clear—so the viewer can read them as a body of evidence rather than a jumble of techniques.
A Daily Routine to Integrate Elements (Sample)
| Time | Activity | Focus |
|---|---|---|
| 10 minutes | Warm-up gestures | Line quality and rhythm |
| 30 minutes | Value studies from a single object | Value relationships and edges |
| 30 minutes | Texture swatches or material pairing | Surface quality and mark variety |
| 50 minutes | One focused drawing (composition + finish) | Integration of line, value, and texture |
| 10 minutes | Reflection and notes | What worked; plan for next day |
This simple table is a guideline. The regular habit of separating practice into focused chunks trains your eye and hand to treat each element as evidence in its own right and in service of the whole.
Section 5: Presenting Evidence in an AP Portfolio
AP Studio Art portfolios (Drawing concentration) are judged on quality, concentration, and breadth. When line, value, and texture are intentionally used as evidence, they serve the rubric: demonstrating technical skill, thoughtful exploration, and a cohesive investigation.
How to Frame Your Work
- Quality Over Quantity: A smaller number of strong pieces that consistently show command of the elements is more persuasive than many inconsistent works.
- Concentration: Show a sustained investigation. For example, explore a single theme (e.g., abandoned places, hands, tensile structures) and use repeated studies that push line, value, and texture in different directions.
- Breadth: While concentrating on a theme, demonstrate a range of techniques—tight rendering, loose gesture, large-scale compositions, small studies—so examiners see depth and versatility.
Documenting Evidence in Your Statements
When writing your portfolio statements, explicitly mention why you chose specific line treatments, value systems, or textured approaches. Explain how these choices function as evidence for your theme. This clarity helps viewers connect technical decisions to conceptual aims.
Section 6: Sample Annotated Exercise — From Observation to Evidence
Here’s a step-by-step walk-through you can try today, designed to be reproduced in a classroom or at home.
- Choose a subject: a worn leather glove on a wooden table with a metal key beside it.
- Step 1 — Quick Gesture (5 minutes): Capture the arrangement and rhythm of the objects using loose, directional lines. Evidence: spatial relationships.
- Step 2 — Value Block-in (20 minutes): Use a soft charcoal or 6B pencil to block in mass values: highlights, midtones, core shadows. Evidence: light source and volume.
- Step 3 — Texture Mapping (20 minutes): On separate small studies, practice the glove’s rough leather, the wood’s grain, and the key’s reflective highlights. Evidence: material contrast.
- Step 4 — Final Rendering (60–90 minutes): Combine the block-in with refined line and textured treatments, paying attention to edge control—use hard edges where metal meets air, softer edges where leather folds into shadow. Evidence: a coherent visual argument.
- Reflection: Write a short note: Which choices made the objects feel tangible? Where did you fight with the value transitions? What would you emphasize if this were a portfolio piece?
Section 7: Common Pitfalls and How to Avoid Them
Students frequently make similar missteps when trying to present line, value, and texture as evidence. Here are the most common and practical fixes.
Pitfall: Overworking Details Too Early
Fix: Block in values and major lines first. If you detail before establishing light and composition, you may end up correcting tonal inconsistencies later at the cost of freshness.
Pitfall: Confusing Texture with Noise
Fix: Ask, “Does this texture support my claim about the object?” If not, simplify. Good texture emphasizes material qualities; poor texture distracts.
Pitfall: Using Line and Value Independently
Fix: Practice integrating—use line to indicate edges and value to reinforce mass. Remember, a single soft edge can communicate both the contour and the fall of light.
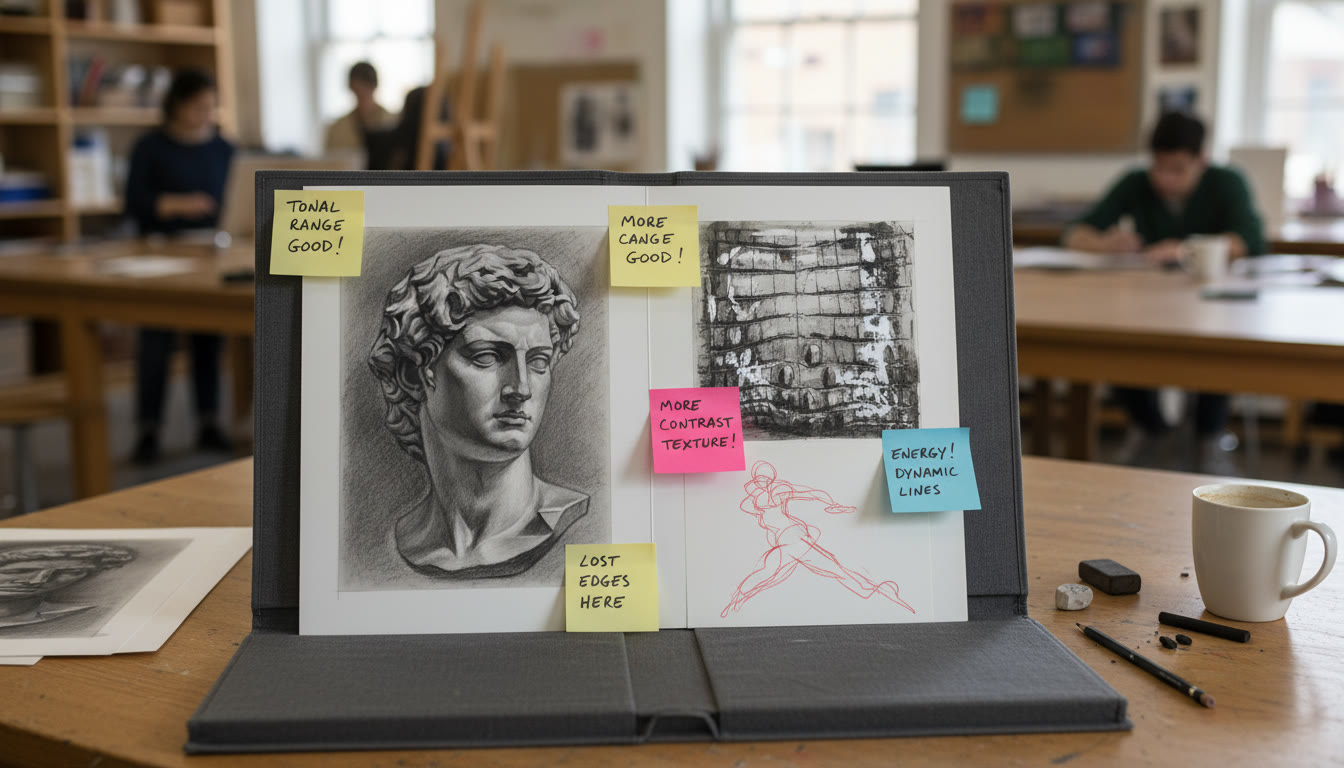
Section 8: Critique Practices — Reading Evidence Like a Judge
Learning to critique your own work through the lens of evidence sharpens judgement. Try this three-step critique routine after every finished drawing:
- Identify the Claim: What is the main idea or feeling the piece is trying to convince you of?
- List the Evidence: Which lines, values, and textures most strongly support that claim?
- Check the Gaps: Where is evidence missing or contradictory? Could value choices or line quality be clarified?
For portfolio preparation, collect these critiques as short notes under each piece — they become useful talking points during portfolio reviews and help you write stronger artist statements.
Section 9: Using Technology and Personalized Tutoring to Amplify Progress
Today’s students have access to tools that can accelerate discovery. Digital photo references, slow-motion video for gestures, and replayable timed exercises help build reliable habits. Personalized tutoring—such as Sparkl’s 1-on-1 guidance—can diagnose recurring technical issues, suggest focused exercises, and craft a tailored plan that fits deadlines and college portfolio goals. Tutors can also provide curated prompts and AI-driven insights to help you practice smarter, not just longer.
How to Use Tutoring Effectively
- Bring Work-In-Progress: A tutor can point out where evidence contradicts your claim and recommend precise fixes.
- Request Skill-Specific Sessions: For example, book a session focused solely on convincing metallic reflections or accurate skin values.
- Follow-Up With Short Daily Tasks: After a tutorial, keep momentum with short, targeted drills (10–30 minutes) to reinforce learning.
Section 10: Final Tips for Exam Day and Portfolio Submission
On submission day, treat every piece as testimony. Make sure presentation is clean, labels are clear, and your portfolio statement articulates how your formal choices (line, value, texture) support your investigation.
Checklist Before You Submit
- Consistency: Do your pieces show a recognizable visual voice and sustained inquiry?
- Clarity of Evidence: Can an unfamiliar viewer read the line, value, and texture and understand your intent?
- Technical Execution: Are values resolved, edges controlled, and textures intentional?
- Documentation: High-quality photos/scans that capture tonal range (not too bright or dark) and show surface details where relevant.
Conclusion: Make Every Mark Count
Line, value, and texture are more than techniques — they are the evidence you present to the viewer. When you treat each mark as a piece of testimony, your drawings become persuasive, alive, and convincing. Start small, practice deliberately, and integrate critique into your routine. If you want a faster path, consider one-on-one support to fine-tune weak spots—personalized tutoring like Sparkl’s can help you turn observations into consistent, portfolio-ready evidence through tailored study plans and focused feedback.
Remember: the most powerful drawings are not the ones with the most detail, but the ones in which every detail has purpose. Make your marks matter.


No Comments
Leave a comment Cancel