
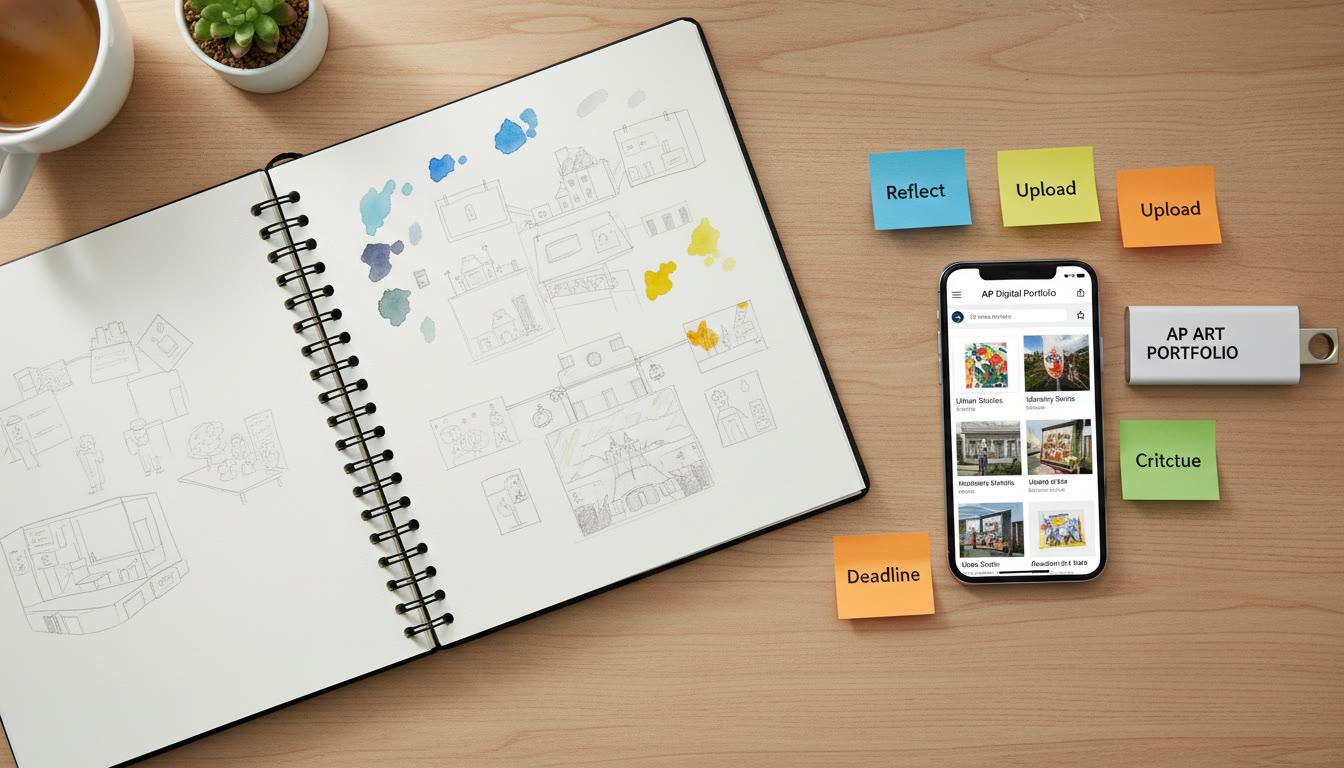
Welcome to Portfolio Day: Why This Moment Matters
Portfolio Day is that electric, slightly nervous checkpoint at the end of a long creative semester when sketches become statements and ideas become evidence. For AP Art and Design students, this is your chance to package months (or years) of work into a clear, persuasive presentation the College Board can evaluate. But beyond scoring, it’s a meaningful reflective exercise: the moment you step back and show how your practice evolved, what informed your decisions, and which ideas you chased down until they landed.
If you’re reading this, you might be juggling images, written evidence, teacher feedback, and a hard deadline. Take a breath. This guide walks you—step by step—through consolidating notes and evidence so your portfolio reads like the thoughtful, coherent body of work it is.
Before You Begin: The Mindset That Changes Everything
Organization is part logistics and part storytelling. When you prepare for Portfolio Day, you’re not just collecting assets; you’re curating a narrative. The best portfolios do two things at once: they show technical growth and map an intellectual or emotional journey. Start with curiosity, not panic. Ask: “What do I want the viewer to understand about my practice by the end of this portfolio?”
This question helps you decide which pieces, images, and notes belong in the final submission and which are valuable for personal archives but don’t serve the central story.
Step 1 — Take Inventory: Create a Master List
Begin with a complete inventory of everything you have. This is a ruthless but necessary cull: list images, sketches, studies, notes, artist statements, critiques, and reference material. Treat this like a research database.
- Image files (name, date, dimensions, medium)
- Supporting studies or progress shots (why you made them)
- Written evidence drafts—notes, captions, artist statements
- Teacher and peer feedback (date-stamped if possible)
- Inspirational references and research (books, artists, cultural context)
Use a spreadsheet or a simple table to track these items. Below is a practical template you can reproduce in Google Sheets or Excel.
| Item Type | File Name / Title | Date | Medium / Size | Role In Portfolio | Notes |
|---|---|---|---|---|---|
| Main Work | Untitled_WebOfRivers.jpg | Mar 12, 2025 | Mixed Media, 24in x 18in | Selected Works (Best 5) | Shows technical shift to layered collage |
| Study | ValueStudy01.jpg | Feb 3, 2025 | Pencil on Bristol | Sustained Investigation Image | Informs approach to light in final piece |
How to be honest during inventory
Don’t keep everything because you “might” use it. If a piece doesn’t support your narrative or show growth, archive it elsewhere. That physical and mental space makes the remaining evidence stronger.
Step 2 — Choose a Coherent Focus for Your Sustained Investigation
AP Art and Design portfolios require a Sustained Investigation and Selected Works. Your Sustained Investigation should have a clear focus—an idea, question, problem, or theme you’ve explored over time.
Choose an angle that you genuinely care about. It can be technical (exploring texture through printmaking), conceptual (identity and place), or methodological (a process-driven inquiry). The strongest investigations arise from genuine curiosity, not from what you think will score highest.
Questions that clarify your focus
- What problem am I repeatedly trying to solve?
- Which materials or processes became essential?
- How did early failures inform later choices?
- What cultural, historical, or personal references guided me?
Step 3 — Consolidate Visual Evidence: Quality Over Quantity
College Board requires specific numbers of images, but within those slots choose images that best reveal change, decision-making, and risk. For example, include:
- Initial sketches or thumbnails that show where you started.
- Middle-stage images that show experimentation.
- Close-up details that reveal craft or surface treatment.
- Final presentation shots with good lighting and accurate color.
Tip: Label images with a consistent naming convention: [YYYYMMDD_Title_Version]. This makes it easier to order files chronologically and reconstruct your process during the written evidence section.
Technical checklist for images
- JPEG or PNG in RGB color mode
- No live or motion photos
- Clear, evenly lit photos—avoid harsh shadows
- Crop to show the work, but keep context if the process depends on scale
Step 4 — Rewrite Your Written Evidence: Clarity, Honesty, and Specifics
Written Evidence is where your notes become narrative. College Board looks for evidence of inquiry, development of ideas, and reflection. That means short, concrete statements beat vague praise.
Structure your entries. For each image in your Sustained Investigation, aim to answer three short prompts: What was I trying to do? What did I try? What did I learn? Keep language specific and avoid filler. Use dates and references when relevant.
Example format for one entry
Title: River Collage Study (Feb 3, 2025) — Intent: Explore layered translucency to represent sediment layers. — Process: Combined tissue overlay, ink washes, and digital transfers to create depth. — Reflection: Learned that transparent layers required sequential drying to prevent bleeding; this informed the glazing technique used in final works.
Step 5 — Tie Teacher Feedback and Research Into Your Story
Instructor comments and research notes are powerful evidence if you summarize them. Instead of pasting long feedback, synthesize key takeaways and describe how you applied them. For example: “After Ms. Alvarez suggested focusing on mark-making variability, I introduced collage fragments to break uniform texture—this generated more dynamic surfaces in subsequent works.”
Include concise references to artists or movements only when they genuinely influenced your choices. A short line like “inspired by Ana Mendieta’s use of site-specific mark making” adds context; a paragraph of name-dropping does not.
Step 6 — Use a Clean Folder Structure for Final Submission
When you’re ready to submit, the technical chaos of misnamed files or misplaced drafts is the last thing you want. Maintain a mirrored folder structure locally and in cloud storage. Here’s a recommended structure:
- /AP_Portfolio_Final
- /Sustained_Investigation
- /Images
- /Written_Evidence
- /Selected_Works
- /References_and_Feedback
- /Submission_Checklist.pdf
- /Sustained_Investigation
Export a Submission_Checklist that records file names, final sizes, and whether each component has been marked final. Print a hard copy in case your school deadline requires teacher sign-off.
Step 7 — Build a Final Review Routine
Don’t submit on a whim. Review your portfolio with fresh eyes using a checklist and at least two reviewers: your teacher and a peer who knows your work. If possible, schedule a mock “Portfolio Day” where you present your narrative out loud—this clarifies any weak transitions or missing evidence.
Final Review Checklist
- Required number of images uploaded in correct sections
- All written evidence answers the “What, How, Learned” prompts
- Images named and ordered chronologically where required
- Artistic Integrity Agreement reviewed and signed where required
- Technical specs verified (file format, color mode, size)
- Backup copies exist in at least two places
Common Pitfalls and How to Avoid Them
Even the most talented students stumble on logistics. Here are frequent missteps and how to dodge them.
- Procrastinating uploads: Digital submissions can be slow. Upload early to avoid server or school network issues.
- Overloading with images: Fewer, stronger images that show process and growth beat a scattershot collection.
- Vague reflections: Be specific—what technique changed? Which critique led to a shift?
- Not backing up work: Keep copies on cloud and an external drive.
- Ignoring technical requirements: Confirm file types and sizes; a single wrong format can delay scoring.
How to Make Time in a Busy Schedule (Realistic Study Plan)
With classes, sports, and extracurriculars, Portfolio Day can feel impossible. Use a simple time-blocking approach over four weeks before your internal deadline:
| Week | Main Focus | Tasks |
|---|---|---|
| Week 4 | Inventory & Selection | List images, choose Selected Works, start naming files |
| Week 3 | Image Quality & Details | Photograph works, crop, edit color, save final files |
| Week 2 | Write & Revise Evidence | Draft written evidence, incorporate teacher feedback |
| Week 1 | Final Review & Backup | Mock review, finalize uploads, backup files |
Micro-tasks to fit tight days
- 20 minutes: edit one photo
- 30 minutes: write/refine one evidence entry
- 10 minutes: organize three files on your drive
Tools and Techniques That Save Time
Leverage affordable tools to speed up workflow: a simple tripod, consistent lighting (daylight or softbox), and basic photo-editing software. For note consolidation, use cloud docs with version history so you can revert if needed.
If you want guided, one-on-one support, Sparkl’s personalized tutoring offers focused sessions on portfolio organization, writing evidence, and critique practice—helpful when you need targeted feedback without generic advice. Their tutors can offer tailored study plans and AI-driven insights to sharpen your presentation while keeping your authentic voice.
What Scorers Want: Think Like an Evaluator
Scorers look for intentionality and development. They want to see that you asked questions, tried different approaches, and learned from the outcomes. Show those decisions clearly. Use your written evidence to point evaluators to the exact moments where you made choices that mattered.
Avoid absolutes like “This is my best work” without explanation. Instead, narrate: “I chose this piece for Selected Works because it synthesizes the glazing technique I developed after several failed tests.” Specificity matters.
Examples That Clarify (Mini Case Studies)
Here are two short, anonymized examples of how students turned messy archives into coherent portfolios.
Case Study A — The Process-Driven Sculptor
Starting point: Hundreds of small maquettes, inconsistent photos, scattered notes. Strategy: The student grouped maquettes into three process streams, selected five final pieces that best showed development from wire skeletons to finished surfaces, and provided step-by-step images for two complex works. Written evidence emphasized method: how material choices affected structure and how iterative tests led to a signature textural finish. Result: A coherent story about learning through making.
Case Study B — The Theme-Based Painter
Starting point: Strong final images but weak documentation of research and experimentation. Strategy: The student reconstructed a timeline—dated sketches, annotated references, and digitized peer critiques. They rewrote their evidence to show a clear research thread: place, memory, and color memory tests. Result: Evaluators could follow the conceptual development clearly, not just admire finished paintings.
Submission Day: Practical Final Steps
On submission day, do one last full walkthrough on a device similar to what reviewers will use (desktop preferred). Confirm each portfolio component is marked final and print a short submission log that lists file names and timestamps.
Also: confirm your school’s internal deadline (it’s often earlier than the AP Program deadline) and make sure your AP coordinator has ordered your exam if required. This administrative step is easy to miss and essential for scoring eligibility.
After Submission: Reflection and Next Moves
Once submitted, resist the urge to immediately judge the score. Portfolio Day should be a learning milestone—archive your work neatly, note lessons learned for future projects, and celebrate the discipline required to finish. If you plan to use the portfolio for college applications, compile a tailored presentation that highlights the pieces colleges should see.
If you want continued support after submission—for interpreting feedback or preparing future work—Sparkl’s personalized tutoring can help you evaluate results constructively and set goals for the next creative cycle, with 1-on-1 guidance and tailored study plans aligned to your artistic ambitions.
Parting Advice: Your Portfolio Is More Than a Score
Think of Portfolio Day as a conversation: you’re sharing your reasoning, your experiments, and your growth. A tight, honest, and well-documented portfolio invites evaluators into that conversation. It’s less about perfection and more about clarity.
So organize thoughtfully, write honestly, back up meticulously, and allow your voice to come through. You’ve put in the hours—now let your portfolio show why that time mattered.

Quick Checklist: The Last 24 Hours
- Confirm all images meet technical specs and are named correctly.
- Finalize written evidence with the “What, How, Learned” clarity.
- Upload and mark each component as final in the AP Digital Portfolio.
- Save a PDF with your submission log and backup all files.
- Confirm your AP coordinator has ordered your portfolio exam.
- Take a moment to step away—celebrate the work you’ve completed.
Resources to Keep in Mind
Keep a running folder of process documentation for any future portfolios or applications—this is your creative CV. And if you need focused feedback before the deadline, remember that targeted, expert help—like Sparkl’s personalized tutoring—can sharpen your evidence, refine your artist statement, and give you the confidence to submit work that truly represents your practice.
Final Encouragement
Portfolio Day is both an ending and a beginning. It marks the completion of one cycle of inquiry and sets the table for the next. Whether your goal is college credit, scholarship opportunities, or simply to see how far your practice has come, approach this day as a clear, honest presentation of your artistic journey. Organize the evidence, tell the story, and let your work do the talking.
Good luck—your best work is the one you can explain with clarity and pride.


No Comments
Leave a comment Cancel