
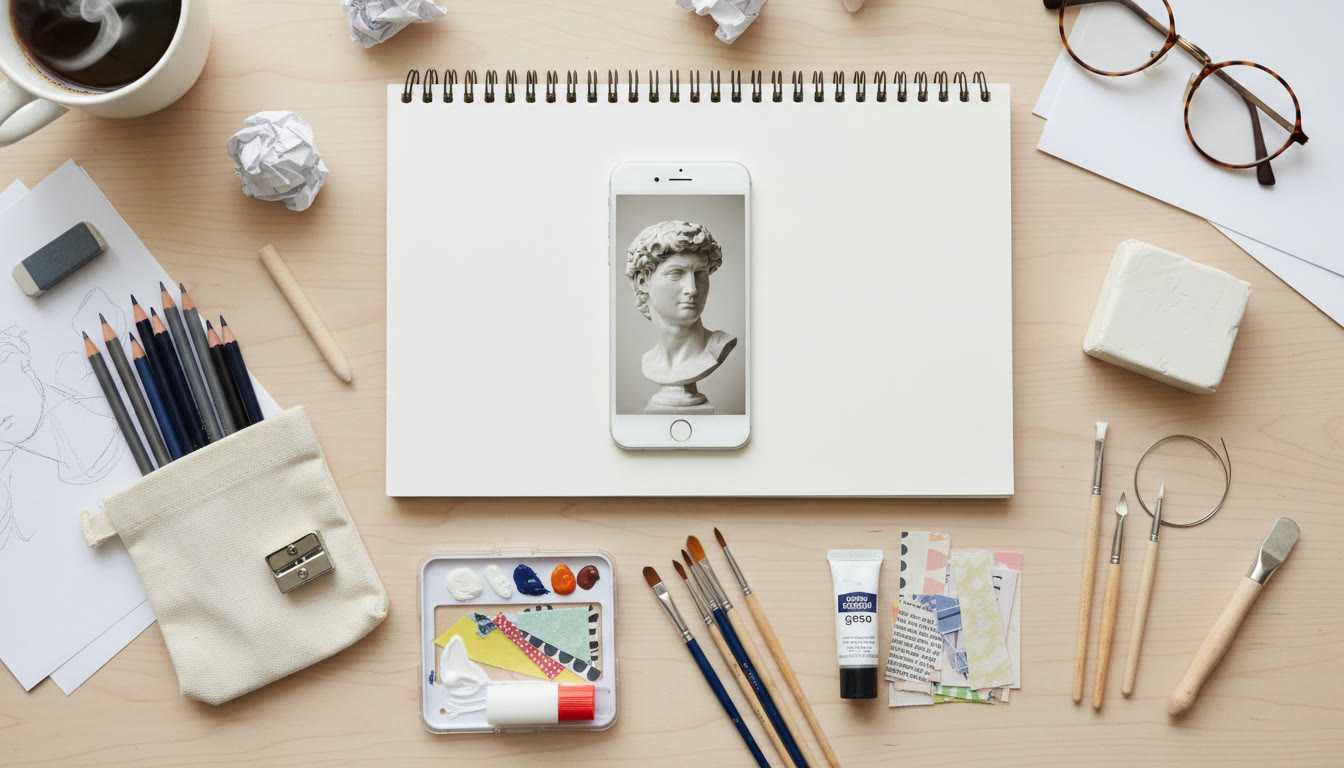
Budget Kits: Starter Sets for 2D, 3D, and Drawing — Smart Picks for AP Art Students
Preparing for AP Art — whether it’s 2D Design, 3D Design, or AP Drawing — doesn’t mean you need to empty your wallet. The right starter kit can be a launching pad: it provides the essential tools, encourages experimentation, and helps you focus on creative problem solving — the very skills College Board graders look for. This guide walks you through smart budget choices, how to use each tool effectively, building a practice routine, and turning early experiments into a strong AP portfolio.
Why a Starter Kit Matters for AP Art Students
A thoughtfully assembled starter kit does three important things: it removes friction (you won’t waste time hunting for materials), it makes techniques repeatable (so you can iterate), and it creates a consistent visual language in your early work. For AP submissions, consistent practice and a focused body of work matter more than owning the fanciest brushes or a top-of-the-line 3D printer.
How to Choose the Right Starter Kit for Your AP Path
First, decide your AP course direction: AP Drawing, AP 2D Design, or AP 3D Design. Each pathway values different problem-solving approaches and materials, although overlap exists. Below are focused starter kit suggestions and explanations for each course.
1. AP Drawing Starter Kit — Essentials and Why They Help
- Pencil set (H to 6B): control value and edge. H pencils for light construction, B pencils for rich darks.
- Erasers: a soft kneaded eraser and a vinyl eraser for precision.
- Blending stumps or tortillons: for smooth value transitions (use sparingly).
- Sketchbook (9×12 or 11×14) with medium tooth: versatile for graphite, charcoal, and mixed media studies.
- Charcoal set (compressed and vine): expands your value range and texture options.
- Fixative (low-odor): to protect charcoal studies and create layers without smudging.
Why this matters: AP Drawing emphasizes observation, compositional choices, and sophisticated value range. These tools enable precise mark-making and tonal control — the building blocks of a compelling submission.
2. AP 2D Design Starter Kit — Essentials and Why They Help
- Acrylic basic color set (primary colors + white and black): mixes cleanly, fast-drying, and versatile for painting and collage grounds.
- Brush set (flat, round, and small detail brush): for varied mark-making and edge control.
- Glue stick + white PVA glue: for clean collage and material attachment.
- Utility knife and cutting mat: precision cutting for layered compositions.
- Mixed-media paper pad (heavyweight 140lb or 300gsm for acrylics): supports paint, collage, and print experiments.
- Found-materials pack: inexpensive textiles, cardboard, tracing paper — encourages material exploration.
Why this matters: 2D Design is about the organization of elements — color, shape, texture, and surface. A basic acrylic set and collage tools let students experiment with contrast, repetition, unity, and visual hierarchy without high cost.
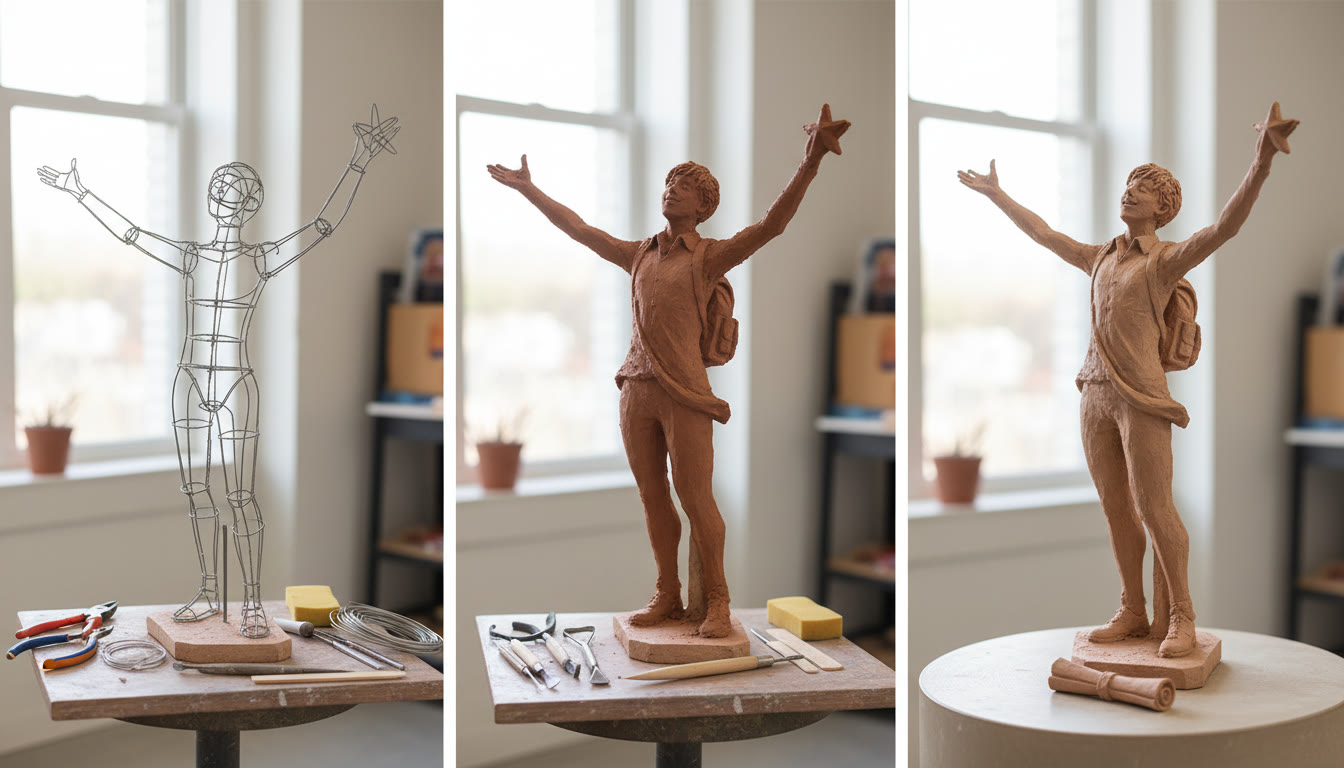
3. AP 3D Design Starter Kit — Essentials and Why They Help
- Air-dry clay (2–5 lb block): no kiln required; great for quick prototypes and refined small sculptures.
- Basic sculpting tool set (loop, ribbon, tapered tools): enables shaping, texturing, and hollowing.
- Foam armature materials (aluminum foil, chicken wire, hot glue): build light internal structures that save material and time.
- Sandpaper and a utility rasp file: for refining surfaces after drying.
- Waterproof sealer or craft varnish: protects finished clay pieces and prepares them for display photographs.
- Compact hand saw or craft knife (for wood or foam): if you want to explore additive and subtractive methods.
Why this matters: 3D Design scores well when you showcase material understanding and methodical problem solving. An affordable clay-based kit lets you explore form, balance, negative space, and surface — the conceptual hallmarks of the course.
How to Assemble a Budget Kit — Smart Shopping, Smart Savings
Buying smart is about spending where it counts and cutting corners where it won’t hurt. Here’s a practical shopping plan.
Where to invest and where to save
- Invest: the one tool that will shape your work daily — for Drawing, a reliable sketchbook and a quality eraser; for 2D, a midrange acrylic tube set and a flat brush; for 3D, a good block of clay and solid sculpting tools.
- Save: decorative or luxury items early on — expensive specialty paints, a full pro brush set, or large-format canvases. You can upgrade selectively as your voice develops.
- Borrow or barter: school art rooms, peers, or art teachers are excellent sources for tools like exacto knives, mat cutters, or hot glue guns.
Buy-in bundles vs. DIY kit
Prepackaged kits are convenient and sometimes economical, but a DIY kit chosen based on the lists above is often better value. Buying individual quality essentials plus a few experimental materials gives you more control over how your work evolves. Keep receipts and test returns — many stores offer student discounts or loyalty savings that add up.
Starter Kit Checklist: One-Page Reference
| Course | Essential Items | Budget Tip |
|---|---|---|
| AP Drawing | Pencil Set, Charcoal, Kneaded Eraser, Sketchbook, Fixative | Buy pencils individually; get a midweight sketchbook instead of expensive archival paper. |
| AP 2D Design | Acrylic Primaries, Brushes, Glue, Cutting Mat, Mixed-Media Paper | Choose student-grade acrylics and upgrade later; use found materials for texture. |
| AP 3D Design | Air-Dry Clay, Armature Supplies, Sculpting Tools, Sandpaper, Sealer | Small clay blocks are cheap; build armatures from recycled materials. |
Practical Exercises to Get the Most from Your Starter Kit
Buying tools is the easy part — practice is where growth happens. Below are structured exercises (10–60 minutes each) to build technical skill and creative thinking.
For Drawing
- Value Ladder Warm-Up (10 minutes): Create a 10-step value scale from lightest to darkest with pencil and charcoal. This sharpens tonal control.
- Contour and Gesture Study (20 minutes): Quick figure or object sketches focusing on line economy and rhythm — one continuous line per pose.
- Refined Study (60 minutes): Pick a small subject (shoe, fruit, hands) and create a fully developed study emphasizing composition and edge control.
For 2D Design
- Color Mixer (20 minutes): Using a limited palette, make swatches and experiment with tints, shades, and muted tones for mood control.
- Collage Composition (40 minutes): Limit yourself to three shapes, two textures, and one color accent — push for balance and tension.
- Series Exercise (2–3 sessions): Create three small pieces exploring the same topic (e.g., urban textures) with different layout strategies.
For 3D Design
- Armature Practice (20 minutes): Build three small armatures with foil and clay to explore balance and center of gravity.
- Texture Mapping (40 minutes): Create a collection of surface textures (incised lines, stippling, added material) and photograph them for record.
- Problem-Solving Project (multi-session): Invent a small functional form (a lamp base, a bowl) and document the iterative process from sketch to finished piece.
Documenting Work for AP Submission
Excellent tools and thoughtful practice are only half the battle. AP portfolios require documentation: clear process images, high-quality photos of finished work, and concise written responses showing intentionality. Your starter kit can help you produce both strong physical pieces and clean progress photos.
Photo and Documentation Checklist
- Use consistent lighting (daylight or a softbox) and a neutral backdrop for photos.
- Take work-in-progress shots at key stages: sketch, first build, first revision, final piece.
- Label images with date and short notes about choices made. This becomes the backbone of your “process” submission.
Common Budget Pitfalls and How to Avoid Them
Students often spend money on trendy items that look inspiring but don’t support focused practice. Here are traps and fixes:
- Pitfall: Buying too many specialty colors or materials. Fix: Start with basics and diversify only when a concept demands it.
- Pitfall: Relying on low-quality brushes that fray. Fix: Invest in one or two reliable brushes and take care of them (clean immediately, reshape, dry flat).
- Pitfall: Skipping documentation to save time. Fix: Quick phone photos after each session are free and invaluable.
How to Structure a Weekly Practice Plan with Your Kit
Consistency beats intensity. Here’s a simple weekly plan that fits around schoolwork and AP prep:
- Monday — Quick warm-ups (20–30 minutes): value ladder or color swatch practice.
- Wednesday — Focused study (60 minutes): a refined drawing, a 2D composition, or a clay form.
- Friday — Experimental session (45 minutes): mix techniques, try a new material from your found-materials pack.
- Weekend — Portfolio documentation and reflection (30–60 minutes): photograph work, update notes, choose next week’s focus.
Small, regular sessions reduce burnout and produce steady portfolio-ready work.
How Starter Kits Feed Creative Development and AP Scoring
AP readers look for evidence of inquiry, experimentation, and refinement. Starter kits create the space to test ideas cheaply and revise rapidly. Repetition with variation (making many small studies of one idea) is often more powerful than scattered attempts across unrelated themes.
Example: From Starter Kit Sketch to AP Submission
Imagine a student exploring “community spaces.” Using a starter 2D kit they:
- Sketch local storefronts (drawing kit).
- Translate a sketch into a mixed-media composition using collage (2D kit).
- Make a small clay relief of window frames (3D kit) to explore depth.
Documenting each step — images, captions, and a short reflection on choices — creates a cohesive body of work that shows curiosity and methodical growth.
How Sparkl’s Personalized Tutoring Can Help (Naturally)
When tools and time are in place, targeted feedback accelerates progress. Sparkl’s personalized tutoring can fit naturally into this process by providing 1-on-1 guidance, tailored study plans, expert tutors with AP experience, and AI-driven insights that highlight weak spots and suggest focused exercises. A short critique session after each project or monthly portfolio reviews can turn good starter-kit work into great, submission-ready pieces.
Budget Upgrade Roadmap: When to Level Up
Once you’ve built a reliable practice habit and explored core techniques, consider strategic upgrades:
- Better paper or canvas: if you’re consistently painting or making archival work.
- Higher-grade pigments or a single professional brush: for improved color depth and brush control.
- Specialty tools: a portable kiln for ceramics or a basic Dremel for refined 3D finishing — only if your projects demand them.
- Lighting kit for photography: affordable LED panels improve documentation quality dramatically.
Upgrade when a purchased item will unlock new work possibilities or solve a recurring problem, not just because it’s shiny.
Student Stories: How Starter Kits Became Portfolios
Short, relatable stories can be instructive: one student used a $20 acrylic set and old newspapers to build a series of collages exploring migration patterns. Another used a small clay block and foil armatures to create a sequence of modular sculptures about repetition. Both students leaned on routine practice and good documentation to build strong, cohesive AP portfolios — and both benefited from targeted feedback sessions to tighten concepts and choose final pieces.
Final Checklist Before You Submit
- Have you documented your process with dated images? (Yes/No)
- Do your pieces show exploration, revision, and refinement? (Provide 2–3 examples in writing.)
- Is your portfolio conceptually coherent? (One-sentence theme summary helps.)
- Have you photographed work consistently with neutral backdrops and clear lighting?
- Did you get at least one round of critique from a teacher, peer, or a tutor (such as Sparkl’s tutors)?
Quick Reference: Low-Cost Materials and Approximate Uses
| Material | Approx Cost Range | Best Use |
|---|---|---|
| Sketchbook (Midweight) | $8–$20 | Daily studies, in-class use, experimental pages |
| Pencil Set | $5–$15 | Value studies, detailed drawings |
| Acrylic Student Set | $10–$25 | Color mixing, underpainting, collage grounds |
| Air-Dry Clay | $5–$20 | Quick prototypes, small sculptures |
| Basic Brushes / Tools | $6–$30 | Controlled marks, surface finishing |
Parting Advice — Make the Kit Yours
Starter kits are not prescriptive rules; they are invitations. The point is not to replicate someone else’s materials list, but to build a small, dependable toolkit that helps you test ideas, take risks affordably, and learn from iterations. Keep a few affordable experiments, a disciplined documentation habit, and look for feedback — whether from teachers, peers, or targeted sessions with Sparkl’s personalized tutoring — so your work keeps evolving.
When budgets are tight, creativity often becomes sharper. Constraints force better choices, clearer concepts, and more deliberate craft. Use your starter kit to explore widely, refine consistently, and tell a story that only you can tell — that’s the heart of an AP-ready portfolio.
Good luck — and enjoy the messy, exciting work of making. Your best toolkit is the one that keeps you curious.


No Comments
Leave a comment Cancel