
Why Great Photos Matter for Your AP Submission
When you’re preparing an AP submission—whether it’s the AP Art and Design portfolio, a lab notebook with photographic evidence, or images for an AP science project—photographs are more than just a formality. They are the visual handshake between your hard work and the reader who evaluates it. Crisp, accurate images let your ideas, techniques, and experimental rigor shine. Sloppy, dark, or distorted photos can make even the strongest work look weaker than it is.
Know the Requirements Before You Shoot
First step: read the submission guidelines carefully. Different AP programs and teacher preferences may have file type, resolution, or aspect ratio rules. If you’re photographing experiments for a science-focused AP project, make sure your images document methods, results, and key observations clearly. For AP Art and Design, images must accurately convey color, texture, scale, and detail.
Ask your teacher these specific questions: What file formats are accepted? Is there a maximum file size? Should images be labeled a certain way? Do they want one image per work or multiple detail shots? Getting clarity up front saves re-shoots and stress later.
Checklist: What to Confirm with Your Teacher
- Accepted file formats (JPEG, PNG, TIFF, etc.)
- Required image dimensions or minimum resolution
- Number of views per work (full image plus details?)
- Naming conventions for files
- Submission platform specifics (how to upload, deadlines)
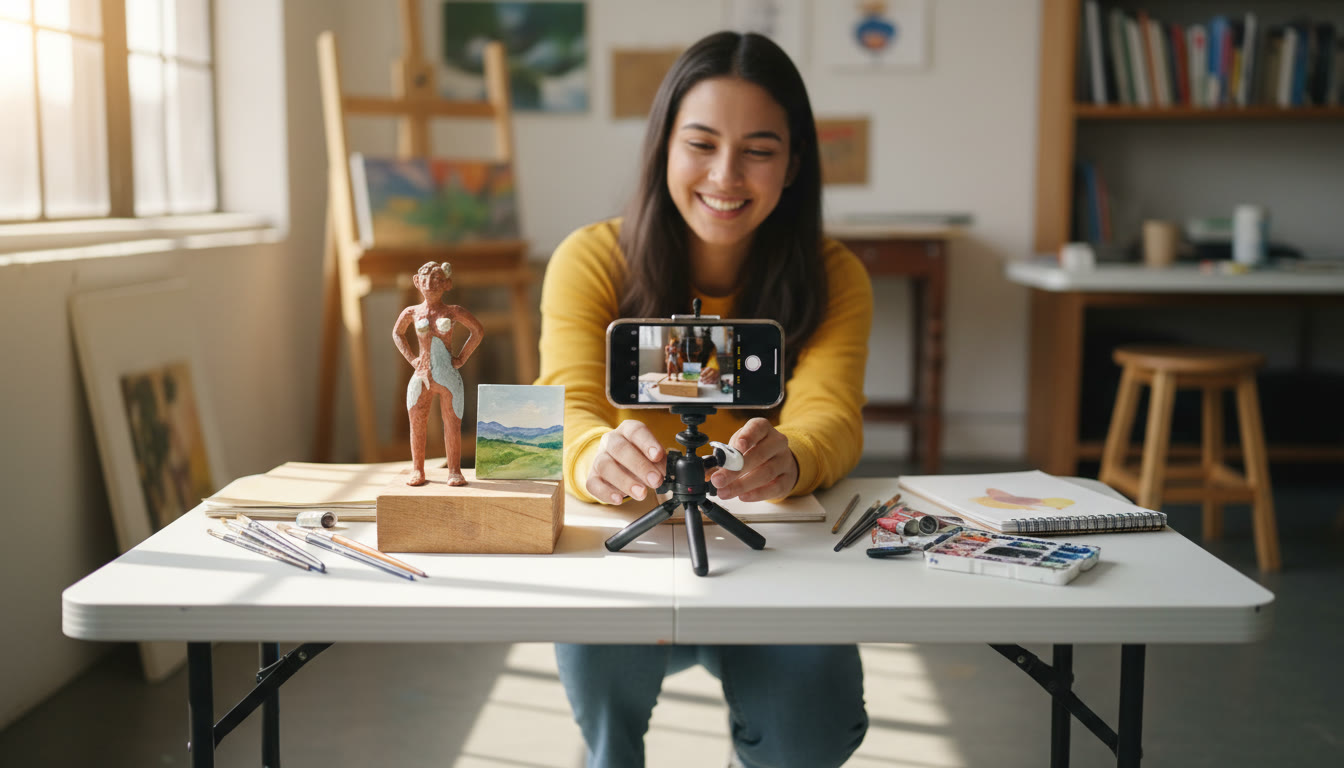
Basic Gear: What You Really Need
You don’t need an expensive camera to capture excellent images—smartphones today are powerful. But the right accessories and mindset elevate a good photo to great.
- Camera: Smartphone (modern models) or DSLR/mirrorless if available.
- Tripod or stable surface: Prevents blur from hand shake and helps with consistent framing.
- Lighting: Natural light from a window often works best. Add continuous LED lights or a softbox for controlled results.
- Backdrop: Neutral backgrounds—white, gray, or black—let your work stand out.
- Scale reference: A ruler, coin, or a small object helps viewers understand the size of the artwork or specimen.
Quick Tip
If you own a camera with manual settings, learn to lock the exposure and white balance. On a phone, tap and hold the focus square to set the exposure, and use a third-party app if you need more granular control.
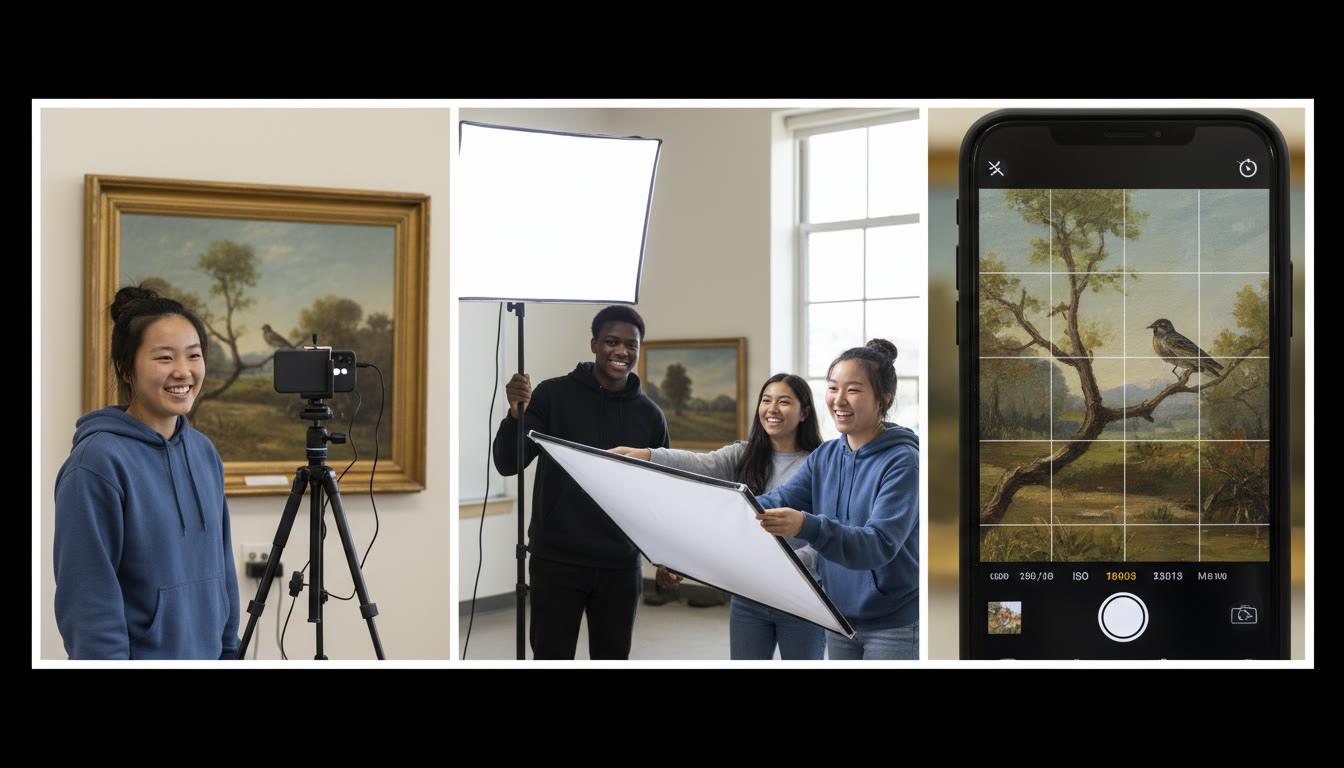
Lighting: The Single Biggest Difference-Maker
Lighting shapes how texture, color, and form are perceived. For both artworks and lab photos, the goal is accurate, even illumination without harsh shadows or blown highlights.
Natural Light Strategy
- Shoot near a large window on an overcast day for soft, diffuse light.
- Avoid direct sunlight that creates hotspots and strong shadows.
- Position the work at a slight angle to the light source to reveal texture without creating one-sided shadows.
Artificial Light Strategy
- Use two light sources—one on each side of the work—to balance shadows. LED panels or desk lamps with daylight bulbs (around 5000–6500K) are ideal.
- Diffuse harsh light with tracing paper, a shower curtain, or a softbox.
- For 3D work or lab apparatus, add a small rim light behind or to the side to separate the subject from the background.
Composition & Framing: Make the Examiner’s Eye Work for You
Good composition communicates purpose. Think like a curator: what view best represents your piece or experiment?
- For two-dimensional works (paintings, drawings): photograph straight-on and keep the plane of the camera parallel to the artwork to avoid keystoning (tilted edges).
- For three-dimensional work (sculptures, ceramics): provide multiple views—front, three-quarter, top, and a detail shot.
- For lab photos: show the setup, a close-up of the crucial measurement or result, and any controls or comparative samples.
- Leave breathing space around the subject—don’t crop too tight unless you’re intentionally showing a detail.
Technical Settings & File Prep
Whether you use a phone or a camera, follow these principles to produce submission-ready files.
| Item | Recommended Setting | Why It Matters |
|---|---|---|
| Resolution | Minimum 2000 px on the longest side (higher if platform allows) | Preserves detail and allows cropping without pixelation |
| File Format | High-quality JPEG or PNG; TIFF if lossless is required | Balance between image quality and file-size limits |
| Color Space | sRGB standard for web/submissions | Ensures colors appear consistent across devices |
| Compression | Use minimal JPEG compression (quality 85–95) | Avoids visible artifacts while keeping file size manageable |
| White Balance | Manual or preset matching light source (Daylight/Tungsten) | Prevents color casts that misrepresent your work |
| Naming | Consistent labels: StudentName_WorkTitle_View.jpg | Makes files easy to identify and organize during grading |
On-Screen vs. Print Color
Many students worry their color will look different on another screen. Use sRGB and, if possible, preview images on more than one device. If a physical print is required, do a test print at actual size to make sure hues and contrasts match your expectations.
Common Pitfalls and How to Fix Them
Here are frequent mistakes and quick solutions you can apply right away.
- Blurry Photos: Use a tripod or increase shutter speed. For phones, enable burst mode or use a self-timer.
- Wrong Colors: Set white balance or photograph a white card alongside your work and correct in post.
- Uneven Lighting: Add a second light source or a reflector to fill shadows.
- Keystoning or Perspective Distortion: Make the camera sensor parallel to the artwork plane, or correct minor distortion in editing software.
- Too Much Compression: Export at higher JPEG quality or use PNG/TIFF where allowed.
Edit Thoughtfully: Enhancements, Not Alterations
Editing should clarify, not create. Adjust exposure, contrast, and white balance to reflect what the work actually looks like in real life. Crop to improve composition, but avoid over-processing—no adding or removing elements that change the meaning of the work or the experiment’s results.
Editing Workflow
- Crop and straighten first to establish composition.
- Correct white balance and exposure next.
- Make small contrast and clarity adjustments to bring out texture.
- Sharpen selectively at the end, and check at 100% zoom to avoid artifacts.
Organizing Files & Metadata
Good organization reduces last-minute panic. Create a folder structure that separates works and views, and use metadata to store captions, dates, and camera notes. Include short captions that explain what the image shows—especially for lab photos where context is essential (e.g., “Sample A after 24-hour incubation, 37°C”).
Example Folder Structure
- AP_Submission_2025/
- Artworks/
- Smith_Jane_Study1_Full.jpg
- Smith_Jane_Study1_Detail1.jpg
- LabPhotos/
- Doe_John_Exp3_Setup.jpg
- Doe_John_Exp3_Result.jpg
- Artworks/
Practical Examples: From Studio to Lab Bench
Let’s look at two short case studies to connect the principles to real student work.
Case Study 1 — AP Art & Design: A Mixed-Media Piece
A student needs to show a 24″ x 36″ mixed-media collage with subtle textural elements and metallic leaf. They set up a neutral gray backdrop, use two daylight LED panels at 45-degree angles, and photograph the piece on a tripod at eye level to avoid distortion. They include a close-up of the metallic leaf with side lighting to reveal sheen and a scale reference (a 6″ ruler partially visible). In post, they correct white balance and slightly increase clarity to emphasize texture, exporting at high-quality JPEG to meet upload limits.
Case Study 2 — AP Science Project: A Chemistry Reaction
A student documents an oxidation reaction over time. They photograph the setup (beaker, labeled reagents), take time-lapse images at regular intervals, and include macro shots to show color changes and precipitate formation. Each image file is labeled with the timestamp and experimental condition. For submission, they pick representative images, add concise captions explaining conditions, and assemble them in sequence to tell the experimental story.
Submitting with Confidence
Before you hit upload, run a final preflight check. Open every image at full size and look for unexpected issues. Confirm that filenames and captions match the submission requirements, and double-check that you haven’t accidentally included any draft images or files with identifying information if anonymity is required.
Pre-Submission Checklist
- All images correctly named and organized.
- Each image meets resolution and file-type requirements.
- Captions and metadata explain the context (materials, scale, experimental conditions).
- Backup copies stored on a separate drive or cloud storage.
- Uploaded test files to ensure no platform-specific conversion issues.
When to Ask for Help: Improving Faster with Guidance
If you’re unsure about lighting, color, or whether a photo truly represents your work, asking for targeted feedback saves time. Personalized tutoring—like Sparkl’s one-on-one guidance—can help you set up an efficient shooting workflow, create tailored study and documentation plans, and use AI-driven insights to spot issues you might miss. A short session can dramatically improve consistency across multiple pieces or experiments, and tutors can give quick critiques of test shots before you finalize your submission.
Practical Timeline: Spread the Work, Avoid the Rush
Don’t leave photographic documentation until the last minute. A paced approach makes space for retakes and improvements.
- Three to four weeks before submission: Plan which works and experiments need photos; gather gear and plan lighting.
- Two weeks before: Shoot primary images and backup images; begin basic edits.
- One week before: Final edits, labeling, and organization. Do a complete preflight check.
- Two days before: Upload test images to the submission platform to ensure compatibility.
Final Thoughts: Your Work Deserves to Be Seen Accurately
Good photographs don’t just document; they advocate for your work. Thoughtful lighting, careful composition, and honest editing make it easier for AP readers to understand your artistic decisions and experimental results. Build a small, repeatable process—plan, shoot, edit, label, and review—and you’ll turn the stressful scramble of submission season into a composed, professional presentation.
Remember: practice matters. Take trial shots early, keep a checklist, and don’t hesitate to ask for help. A short session with a knowledgeable tutor from Sparkl can sharpen your approach, help you avoid common technical pitfalls, and give you the confidence to submit images that truly reflect the quality of your work. You’ve made the effort in the studio and the lab—let your images do that effort justice.
Parting Tip
Treat your submission as a mini-exhibition. Present each work with the same care you would if someone were walking through your show or your poster session—clarity and honesty will always serve you well.


No Comments
Leave a comment Cancel