
IB DP What–How Series: What Evidence Should You Collect for Your IB DP Profile?
Think of your IB DP profile as a carefully curated story about how you learn: what you tried, what worked, what failed, and how you changed because of it. Evidence is the raw material of that story — photos of workshops, annotated drafts of essays, signed confirmations, time logs, recorded data, reflective notes that connect experience to learning. The stronger and more clearly organized your evidence is, the easier it is for teachers, examiners, and university admissions officers to understand the shape of your learning journey.
This guide is written for students who want practical, realistic ways to gather evidence that genuinely reflects progress and achievement across CAS, the Extended Essay (EE), Theory of Knowledge (TOK) and Internal Assessments (IAs). You’ll find checklists, examples, a compact table you can screenshot into your own portfolio, and simple systems to keep everything tidy — including where targeted tutoring like Sparkl‘s personalized tutoring can help polish reflections and structure evidence when you feel stuck.

Why evidence matters (beyond ticking boxes)
Evidence is more than proof of activity. It is the bridge between what you did and what you learned. IB assessors and teachers look for three things in documentation: authenticity (did you actually do it?), progression (did your thinking or skill improve?), and reflection (can you link the experience to learning outcomes or the IB Learner Profile?). Whether your audience is your coordinator, an admissions tutor, or you yourself in five years, good evidence helps your profile read as coherent, honest, and well-crafted.
Well-chosen evidence:
- Shows process, not just product — a final poster means more if it’s paired with planning notes and feedback.
- Demonstrates reflection — short, specific reflections that name learning matter more than long, vague statements.
- Makes assessment easier — clear timestamps, supervisor comments, and verifiable artifacts reduce ambiguity.
What counts as evidence: the essentials
Below are the most useful categories of evidence for the DP. Think in layers: immediate proof (photos, certificates), supporting documentation (emails, rubrics, drafts), and reflective material (structured reflections, learning outcomes mapped to activity).
- Artifacts and products — final and intermediate drafts of essays, posters, code repositories, lab results, artistic works, recordings of performances.
- Authentication — supervisor notes, signed verification forms, emails confirming your role, registration receipts, attendance lists.
- Quantitative data — participation numbers, hours logged, measurable outcomes (e.g., tests run, number of students taught, funds raised).
- Reflective evidence — short structured reflections that answer what you did, what you learned, and what you will change next.
- Media — photographs, short video clips, audio snippets (with consent), flyers, screenshots from event pages.
- Peer and beneficiary feedback — short quotes, survey results, or recorded testimonials from those impacted by your work.
Evidence by DP component: concrete examples
CAS (Creativity, Activity, Service)
CAS is inherently experiential, so evidence should capture intent, action and reflection. For every activity or project, collect:
- A one-sentence goal or plan (what you intended to do).
- Verification: a photo, attendance log, or supervisor confirmation.
- A short reflection (about 150–300 words) connecting the activity to at least one CAS learning outcome.
- Impact metrics where possible (hours, people reached, funds raised).
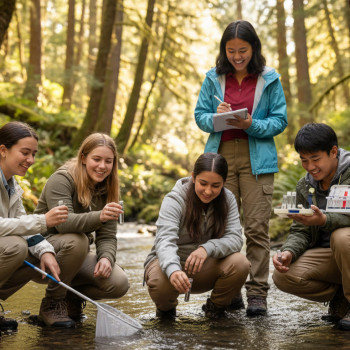
Example: for a community science workshop — workshop plan, materials list, photos of participants, sign-in sheet, a supervisor email confirming your role, and a reflection linking the session to growth in communication and responsibility.
Extended Essay (EE)
The EE is a research process. Evidence should demonstrate intellectual development:
- Annotated bibliography snapshots showing sources explored.
- Draft versions with tracked changes or comment history to show revisions.
- Supervisor meeting notes or emails confirming feedback and guidance.
- Data files, lab notebooks, transcripts of interviews, or raw analysis outputs where relevant.
Theory of Knowledge (TOK)
TOK values critical thinking and connection. Keep:
- Notes from class discussions, short analytic memos, and prompts you responded to.
- Outlines and drafts of presentations or essays, and peer feedback.
- Links between TOK ideas and specific subject work (short cross-references are useful in reflections).
Internal Assessments (IAs) and Subject Work
For IAs, evidence that demonstrates process and moderation is essential:
- Drafts showing problem-solving, data collection, and stepwise improvement.
- Teacher comments, annotated scripts, or marked drafts where you’ve addressed feedback.
- Clear documentation of any experimental protocol, code, or calculations used.
Quick reference table: what to collect and how to store it
| Evidence Type | Purpose | Best Format | Example Entry |
|---|---|---|---|
| Activity photo + sign-in | Authentication and context | JPEG/PNG + PDF sign-in | “2023MMDD_CommunityWorkshop_Photo.jpg” + “2023MMDD_SignIn.pdf” |
| Drafts with comments | Show revision and learning | DOCX/PDF with tracked changes | “EE_Draft_v2_trackedchanges.pdf” |
| Supervisor note | Verifies role and responsibility | PDF or email screenshot | “SupervisorConfirm_ProjectName.pdf” |
| Data files | Evidence of analysis and results | CSV/XLSX/RAW + README | “IA_Data_experimentA.csv” + “IA_README.txt” |
| Reflection | Links activity to learning outcomes | PDF or plain text | “Reflection_CommunityWorkshop_300w.pdf” |
| Certificate / Award | Verifies achievement | PDF scan | “Certificate_ScienceFair.pdf” |
Practical systems for collecting evidence (so it doesn’t pile up)
A reliable routine matters more than a perfect tool. Here’s a student-tested workflow you can adopt in a weekend and keep using:
- Capture immediately. After a workshop or meeting, take a single photo, save any emails, and write a 5–6 sentence reflection on your phone. Quick capture beats perfect capture.
- Name files consistently. Use a simple pattern like YYYYMMDD_Component_Type_Descriptor (e.g., “YYYYMMDD_CAS_Photo_Tutoring.jpg”). Consistent naming makes searching painless later.
- Use a small folder hierarchy. Top-level: CAS, EE, TOK, IAs, Extracurricular. Subfolders by activity or subject.
- Sync and backup. Keep a cloud copy and a local backup. Export important feedback as PDF so annotations don’t disappear.
- Log weekly. Spend 20–30 minutes each week moving captures into your portfolio and writing a short reflection that ties the week’s activities to learning outcomes.
If you prefer guided help, targeted tutoring can accelerate this workflow. A one-on-one session with Sparkl can help you create a tailored portfolio template, improve reflection wording, and turn raw evidence into concise statements that demonstrate progression and insight.
How to write reflections that actually help
Reflections are where evidence earns meaning. A compact, focused reflection has three parts:
- Describe (briefly) — What happened? Be specific: where, who, and what role you had.
- Analyse — What did you learn about your thinking, skills, or values? Tie this to a learning outcome or the Learner Profile.
- Act — What would you do differently next time? How will this learning influence your next step?
Example reflection (short): “I planned and led a 90-minute science workshop for 18 middle-school students. I learned to adapt explanations on the fly when an experiment failed, and discovered that shorter, guided experiments kept engagement higher. Next time I will script contingency activities and ask two peers to run small breakout groups to keep participation consistent.” Short, honest, and tied to action — that’s the sweet spot.
Presentation: digital portfolio vs physical binder
Both formats work; choose what fits your habits and school rules. Digital portfolios are easier to duplicate and share; physical binders can feel more tangible in interviews. Whichever you choose, structure matters:
- Cover page with your name, coordinator contact, and a portfolio index.
- Component sections (CAS, EE, TOK, IAs, extracurriculars), each with an index of entries and a one-paragraph summary of your learning arc for that component.
- Entry pages where each piece of evidence is paired with a short reflection and metadata (date, location, supervisor name, file name).
Metadata example to include with every entry: date, role, location, supervisor name, time spent, related learning outcomes. Clear metadata means your reader doesn’t have to guess what an artifact shows.

Ethics, permissions and authenticity
Honesty is non-negotiable. Never fabricate hours, stage photos, or misrepresent a role. Where photos include other people, obtain consent — a quick signed note or an email is sufficient. If your activity involved minors or sensitive data, anonymize personal details and follow your school’s safeguarding rules. Authenticity doesn’t only protect you — it also builds trust in your reflections and the judgments they support.
Common pitfalls and how to avoid them
- Trap: Too many raw files, not enough synthesis. Fix: weekly curation and a short reflection attached to each entry.
- Trap: Vague reflections that don’t connect to learning. Fix: follow the describe-analyse-act structure and name at least one concrete learning outcome.
- Trap: Files vanish or get corrupted. Fix: two backups (cloud + local) and export editable documents to PDF after finalizing.
- Trap: Relying on screenshots of social media without permissions. Fix: get written consent and preserve original files where possible.
Turning a small activity into strong evidence: three short case studies
Case 1 — A short tutoring stint: keep the lesson plan, photos of the session (consent), a sign-in sheet, a short reflection mapping what you learned about communication, and a supervisor note from the teacher who referred you. Add a short metric like “improvement of average score by X points” if you ran assessments.
Case 2 — A science IA: keep raw data files with a README, draft iterations with supervisor comments, screenshots of code or calculations, and a final reflection explaining the method choices and limitations.
Case 3 — A creative project: store sketches, rehearsal videos, audience feedback, a program or flyer, and a reflective note about your creative process. If you collaborated, include a line about your specific role and a short peer verification.
Tools and templates you can adopt
You don’t need fancy software. A simple folder structure, a spreadsheet log, and a cloud folder are enough. If you want templates, make a one-page entry template that includes:
- Title of activity
- Date(s)
- Role
- Files attached (file names)
- Supervisor / verifier
- Hours
- Reflection (describe, analyse, act)
For students who prefer guided feedback, short targeted sessions — for instance, a 30–60 minute review to tighten reflections or to create a clean portfolio index — can save hours later. A focused tutoring session with Sparkl can help you convert notes into succinct evidence statements and build a presentable portfolio template tailored to your DP components.
Final checklist before submission or review
- Every entry has a date, supervisor/verifier, and at least one short reflection.
- Files are clearly named and stored in component folders.
- Photos and media have consent notes where required.
- Drafts show revision history (tracked changes, versioned filenames).
- Data files include a short README describing columns, units, and any transformations.
- Backups are in place (cloud + local) and a final export of the portfolio is saved as PDF.
Wrapping up your evidence strategy
Good evidence is systematic, honest, and reflective. It turns activity into a narrative of growth by showing process, verification, and learning. Start small — capture immediately, name consistently, and reflect weekly — and you’ll find the panic of last-minute portfolio assembly melts away. The real goal is not to impress with quantity but to present a clear, credible record of how you learned and changed during the DP.
This guide focused on practical, component-by-component evidence you can collect, how to structure and name files, and how to write reflections that communicate real learning. By keeping your documentation authentic, organized, and reflective, you make your IB DP profile a strong, honest record of achievement and growth.





















No Comments
Leave a comment Cancel